> ## Documentation Index
> Fetch the complete documentation index at: https://docs.runway.com/llms.txt
> Use this file to discover all available pages before exploring further.
# Headcount planning
> Build a headcount plan in Runway using HRIS data, segmented databases, and drivers for employee counts and costs.
Headcount planning helps you model current employees, future hires, department-level headcount, and related payroll costs. Use the new HRIS database approach for new implementations; use the legacy expand-by-dimension approach only for older models already built that way.
**Which approach should I use?**
* **New HRIS databases:** Use regular databases with segmentation. This is recommended for new implementations.
* **Legacy HRIS databases:** Use **Expand by dimension** in a model. This remains supported for existing models built with the legacy pattern.
## Step 1: Set up your employee database
The first step is getting employee data into Runway. The recommended path is to connect an [HRIS integration](/integrations/hris/rippling).
 If you do not have a supported integration available, use one of these alternatives:
* **Google Sheets:** Export employee data to a sheet and connect it to Runway. Keep the sheet current because Runway reflects the connected sheet data.
* **Manual setup:** Create a standalone database directly in Runway with no external data source.
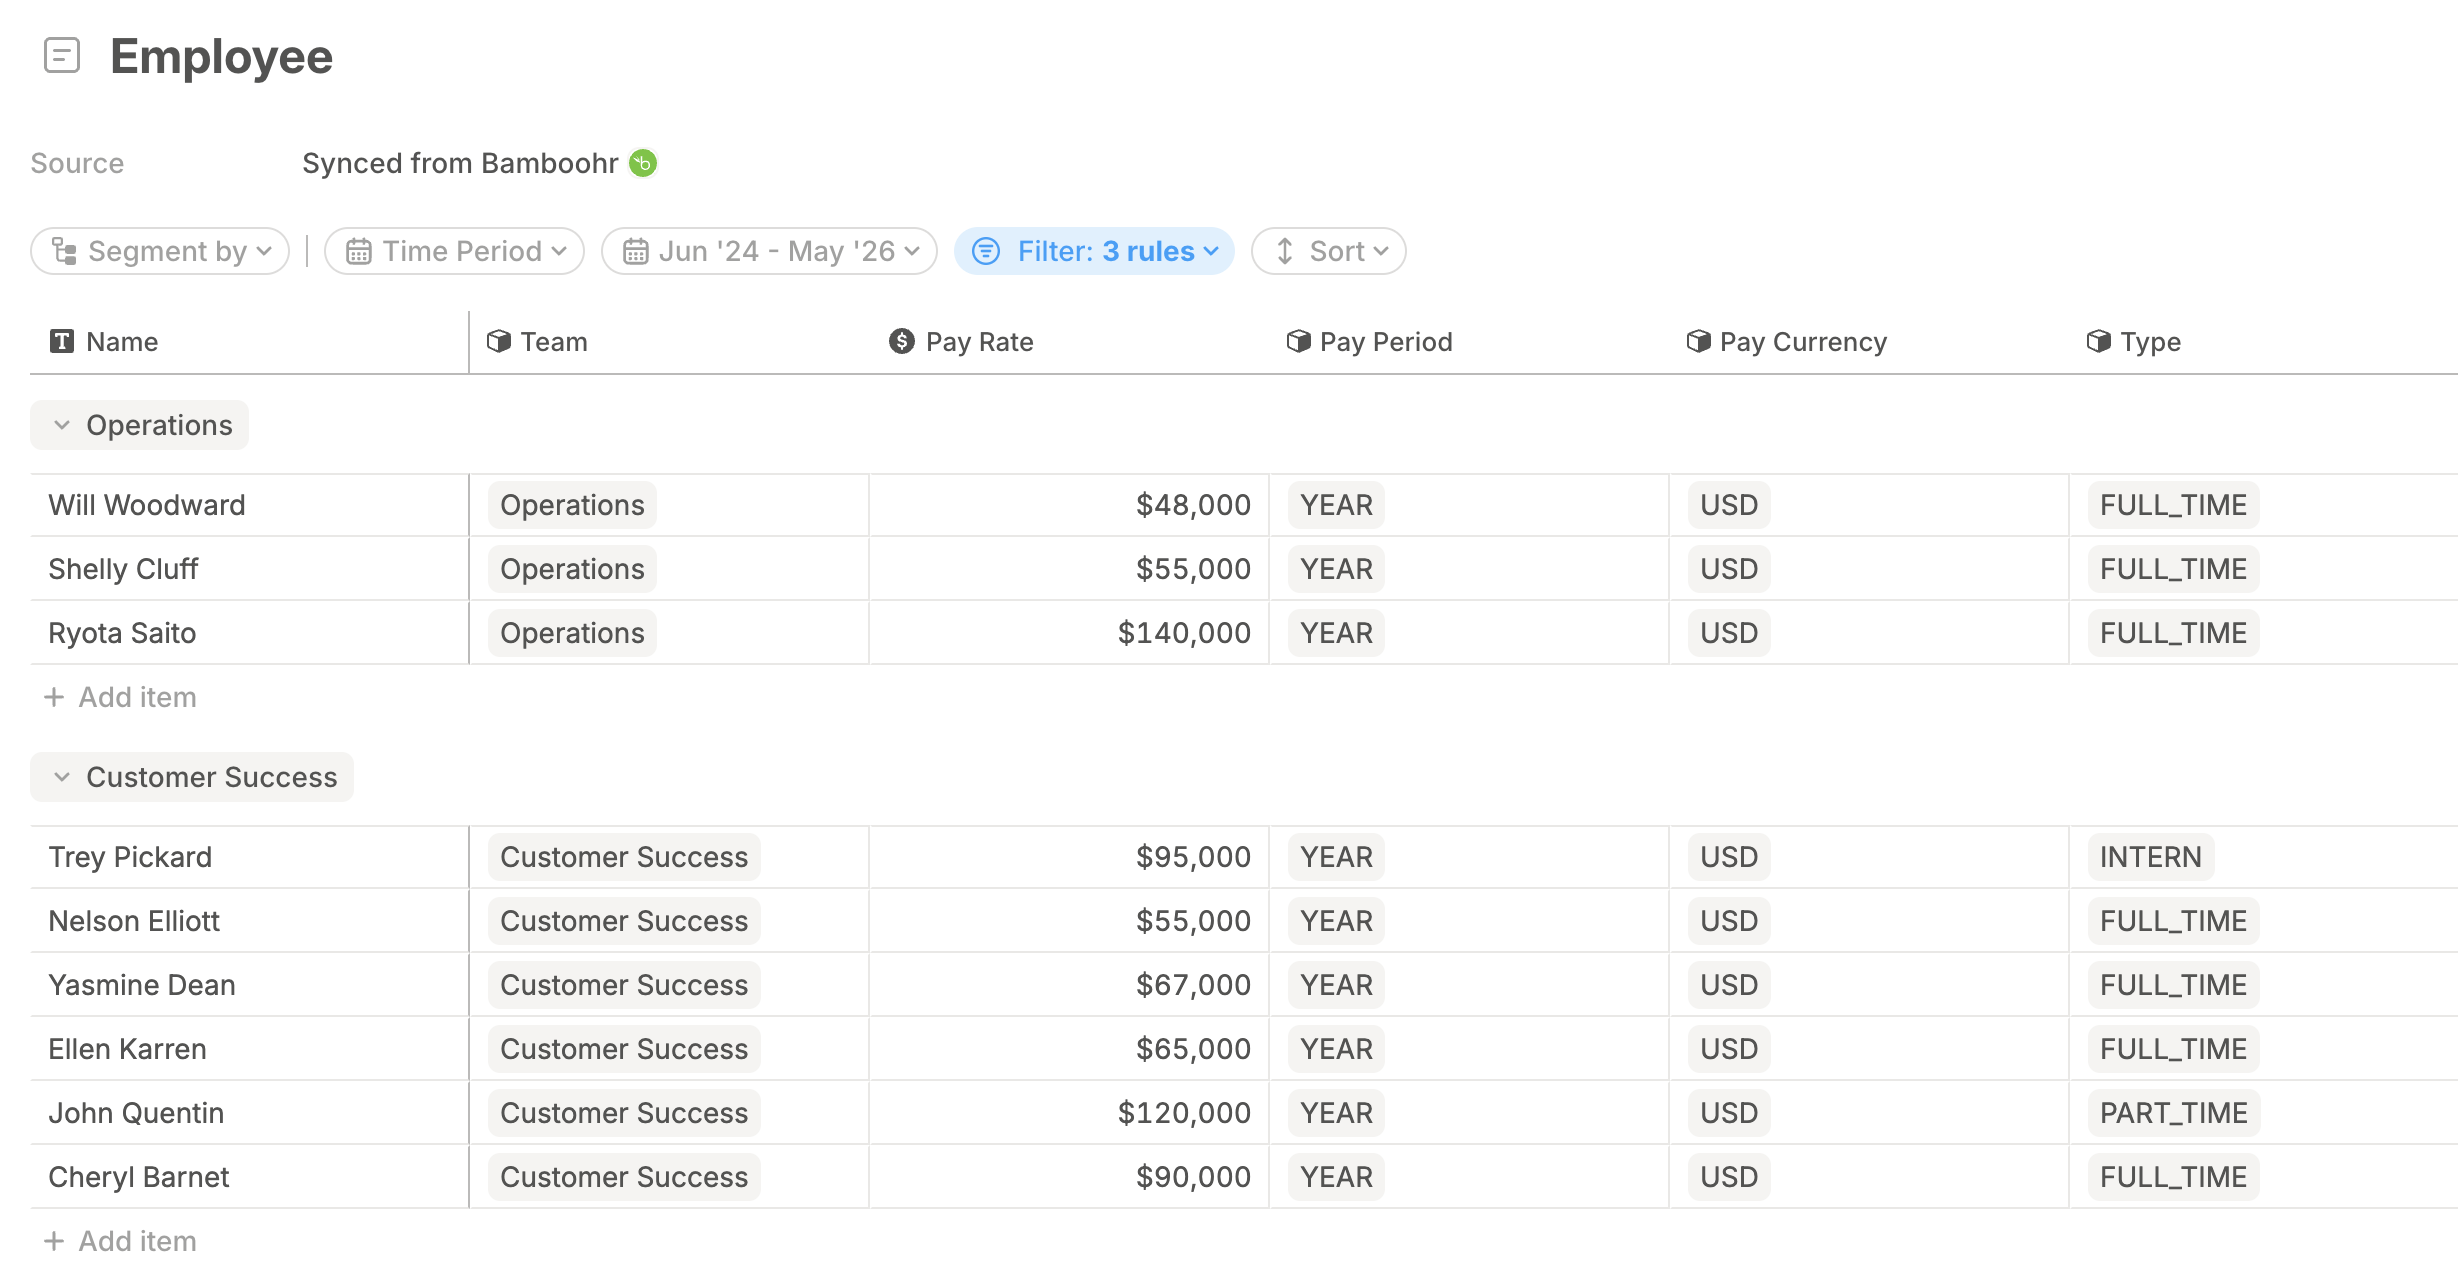
Once your database exists, populate key fields such as **Start date**, **Termination date**, and dimensions for breakdowns such as **Department**, **Role**, or **Location**.
## Step 2: Create headcount drivers
Choose the approach that matches your HRIS database type.
### Database with segmentation
New HRIS databases behave like regular databases in Runway, so you can reference them in formulas and stack them to create drill-ins. When segmenting by dimensions that change over time, such as Department or Job Title, segment from the source query so historical changes are captured.
Add a database that points to your Employees query or employee source database.
In database configuration, segment by the dimension you want to aggregate to, such as Department. This pulls dimension values from the query so new departments and changes can flow in.
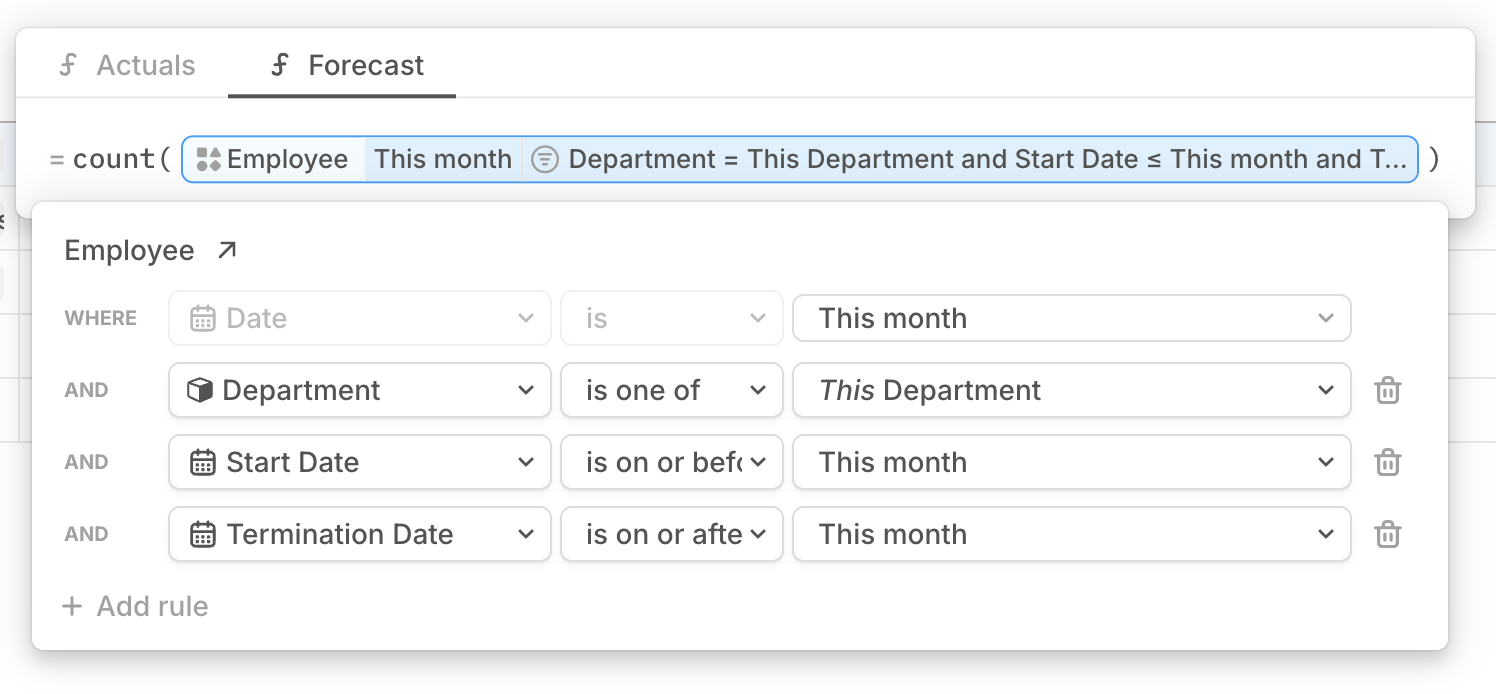
Add a numeric driver column called **Headcount**.
Set the formula to count employees where the employee's Department equals this database row's Department, the Start date is on or before this month, and the Termination date is on or after this month.
Add columns such as monthly salary cost or average salary using the same pattern: reference the Employees database and filter to the current row's segment.
### Expand by dimension
If you are working with a legacy HRIS database, use **Expand by dimension** to create one headcount driver per dimension value.
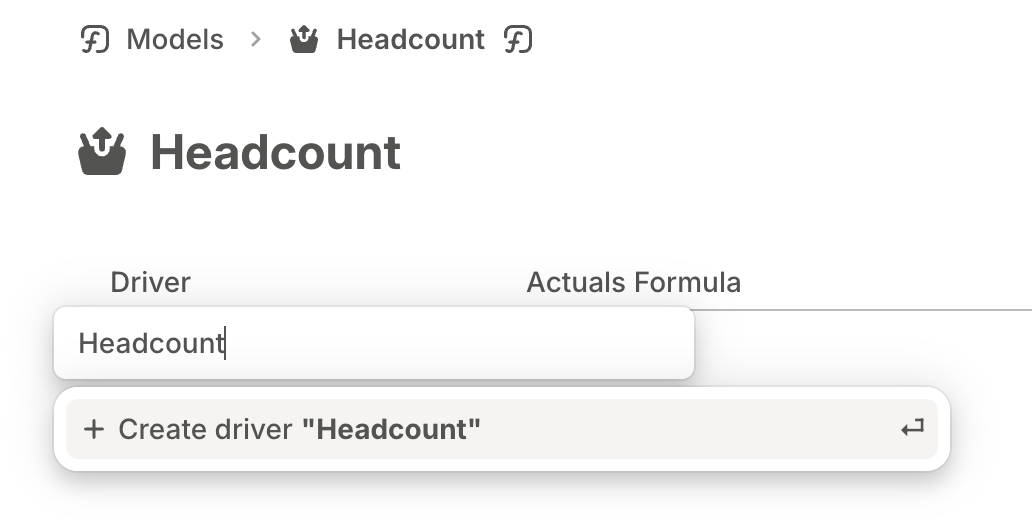
In a model, select **+ Add Driver** and create a driver called **Headcount**.
If you do not have a supported integration available, use one of these alternatives:
* **Google Sheets:** Export employee data to a sheet and connect it to Runway. Keep the sheet current because Runway reflects the connected sheet data.
* **Manual setup:** Create a standalone database directly in Runway with no external data source.
Once your database exists, populate key fields such as **Start date**, **Termination date**, and dimensions for breakdowns such as **Department**, **Role**, or **Location**.
## Step 2: Create headcount drivers
Choose the approach that matches your HRIS database type.
### Database with segmentation
New HRIS databases behave like regular databases in Runway, so you can reference them in formulas and stack them to create drill-ins. When segmenting by dimensions that change over time, such as Department or Job Title, segment from the source query so historical changes are captured.
Add a database that points to your Employees query or employee source database.
In database configuration, segment by the dimension you want to aggregate to, such as Department. This pulls dimension values from the query so new departments and changes can flow in.
Add a numeric driver column called **Headcount**.
Set the formula to count employees where the employee's Department equals this database row's Department, the Start date is on or before this month, and the Termination date is on or after this month.
Add columns such as monthly salary cost or average salary using the same pattern: reference the Employees database and filter to the current row's segment.
### Expand by dimension
If you are working with a legacy HRIS database, use **Expand by dimension** to create one headcount driver per dimension value.
In a model, select **+ Add Driver** and create a driver called **Headcount**.
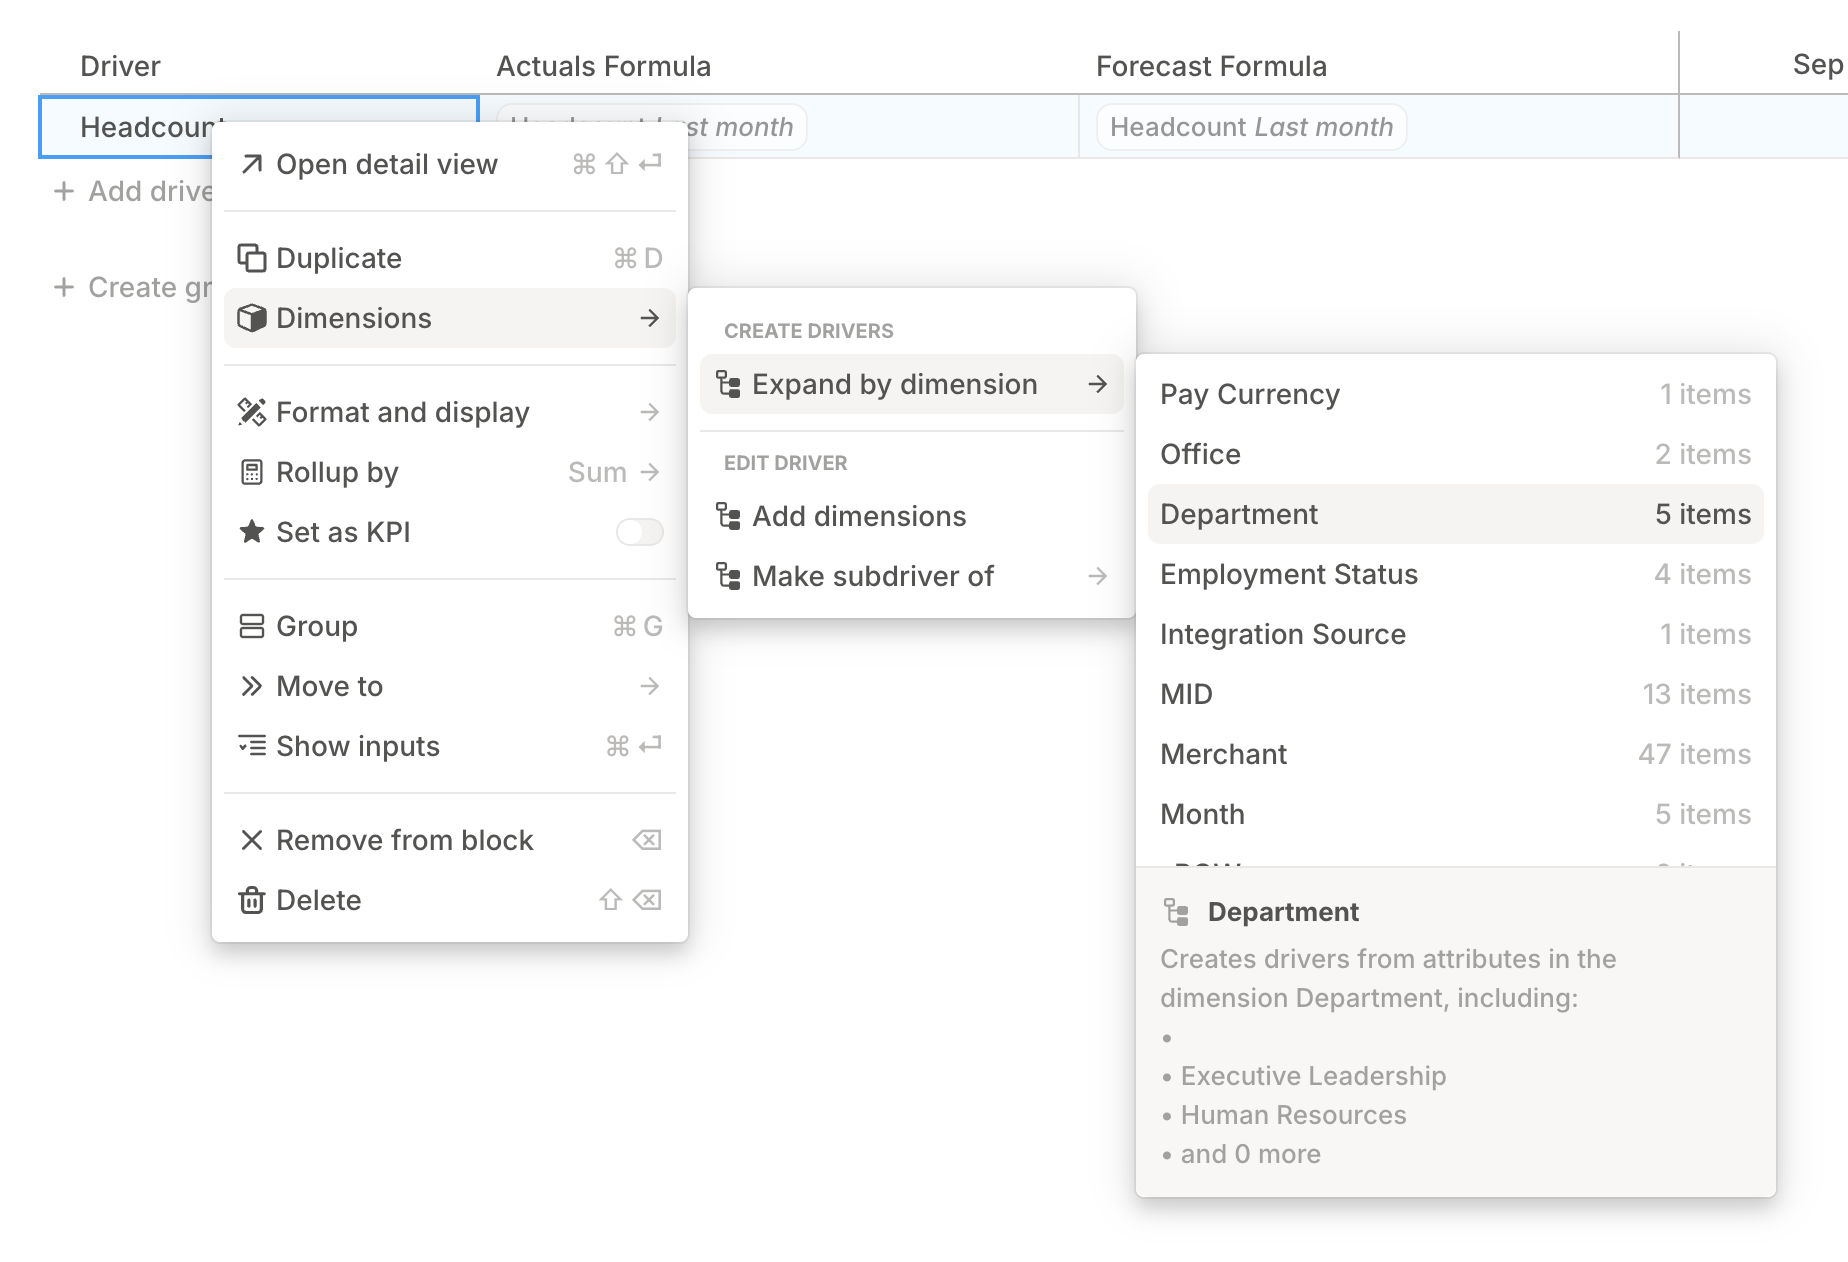
 Right-click the new driver, open **Dimensions**, choose **Expand by dimension**, then select the dimension you want to segment by.
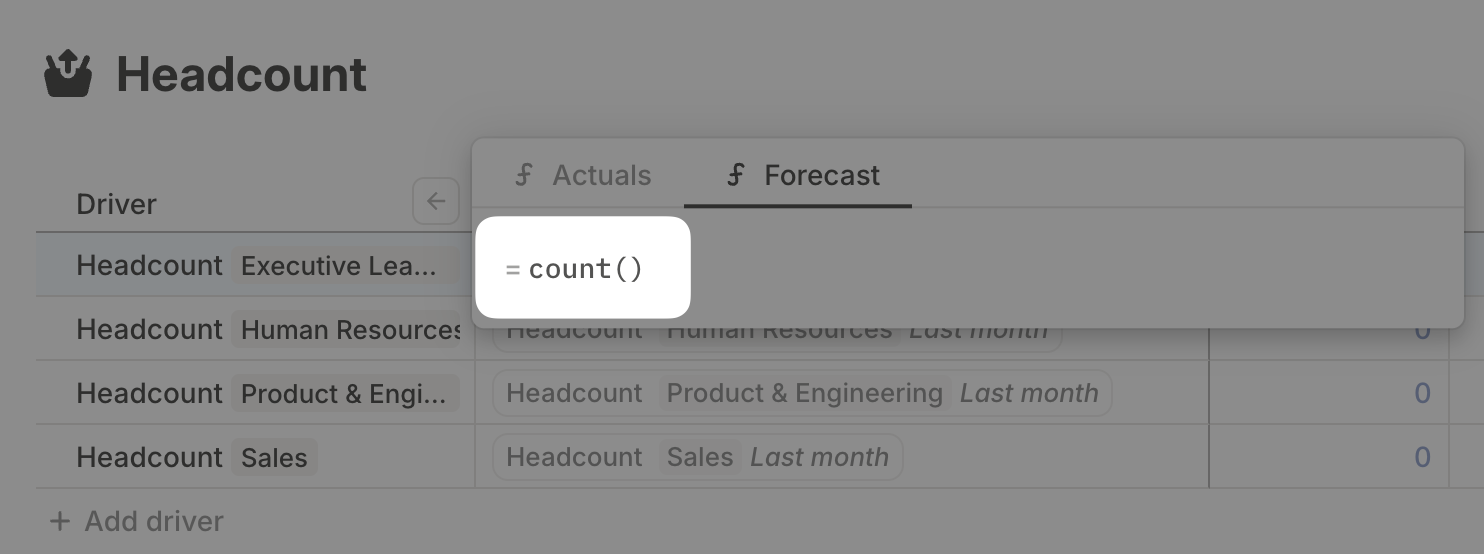
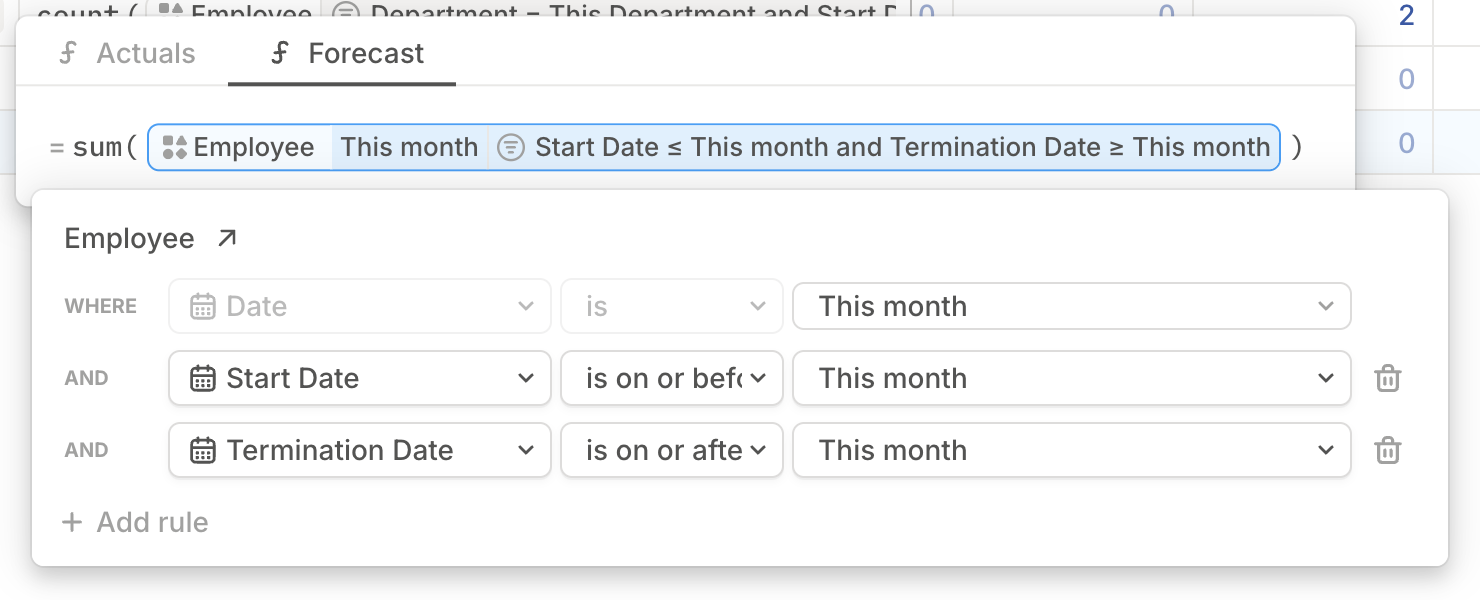
 Double-click the forecast formula cell for one dimensional driver and use `count()` to count employees.
 Filter the Employees database to the matching dimension value, then add date filters for active employment: Start date on or before this month and Termination date on or after this month.
 Copy the formula to the rest of the headcount drivers. Because the drivers and formulas reference the same dimension, the filters match each segment.
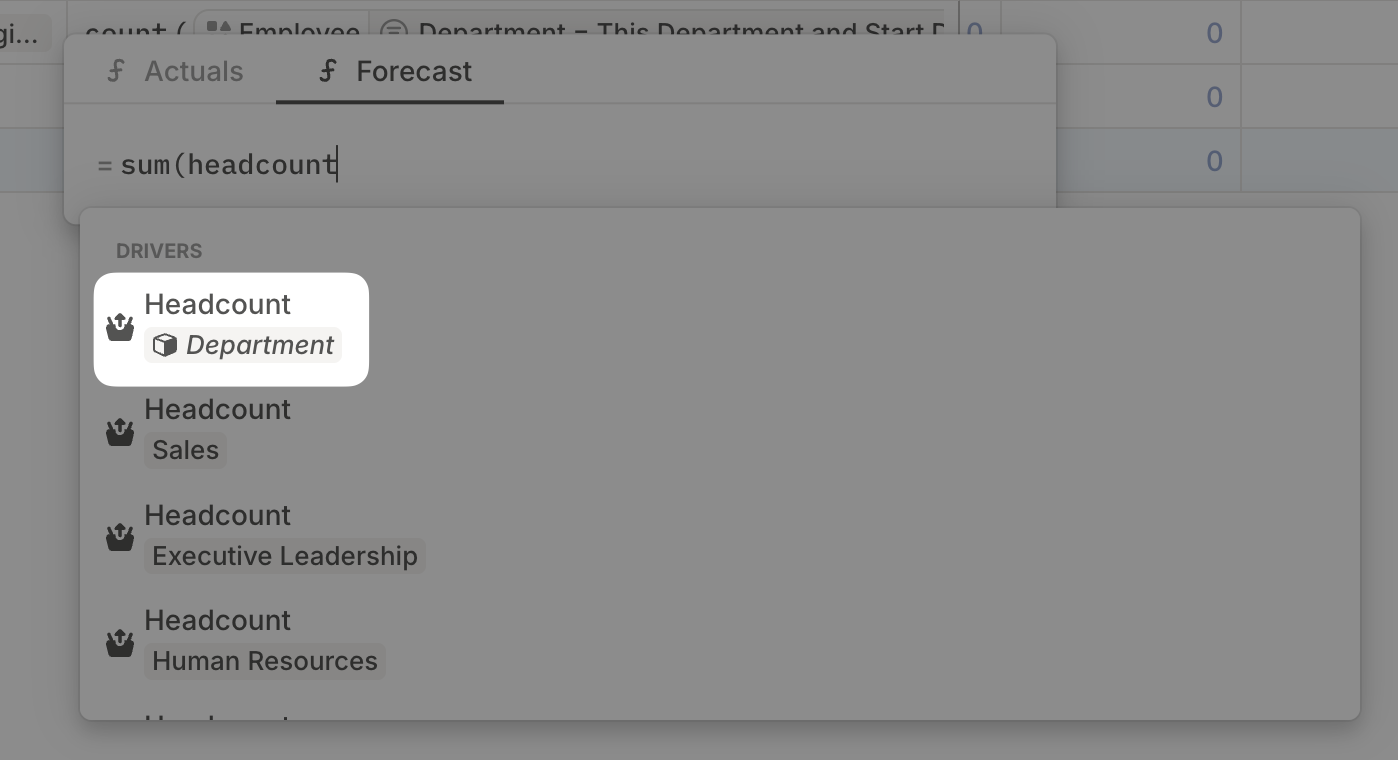
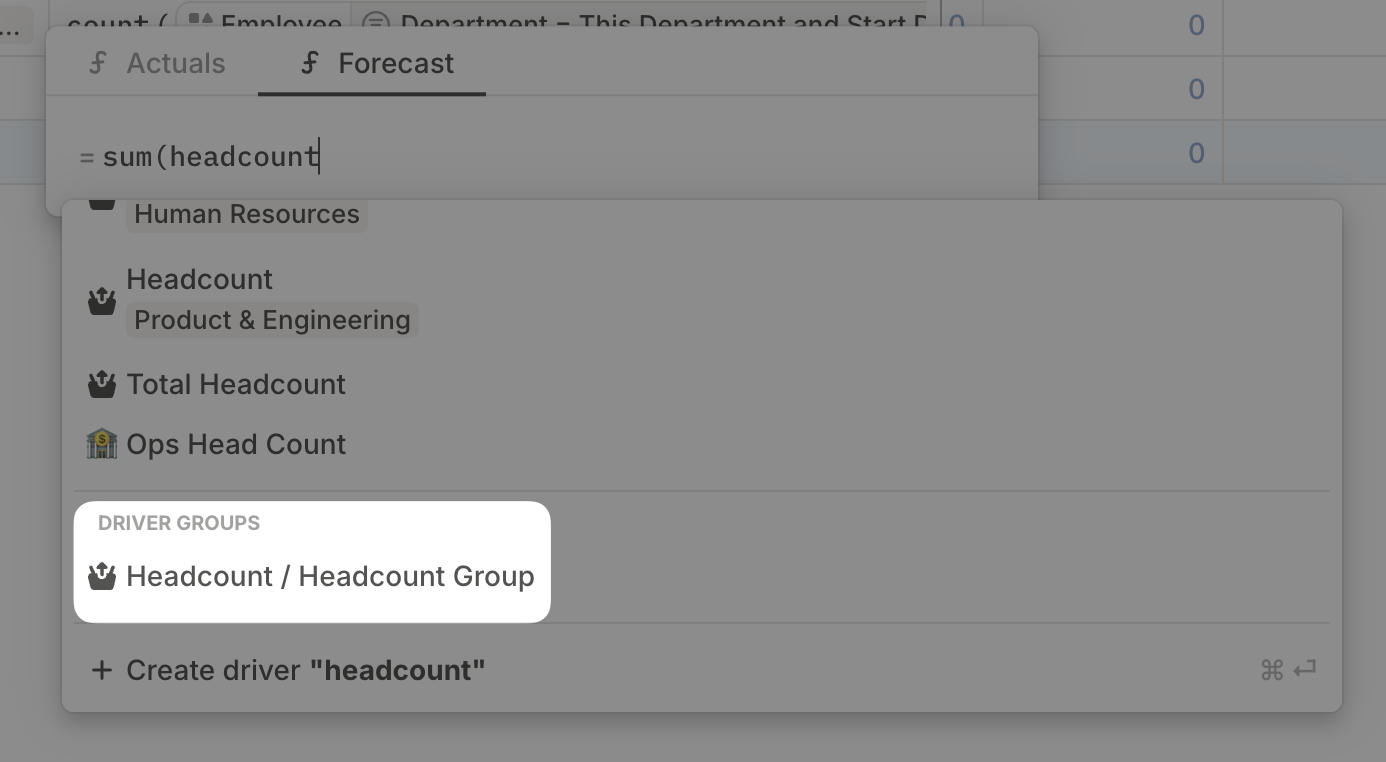
Create a **Total Headcount** driver and sum the segmented headcount drivers, the driver group, or the database directly.
If you have multiple dimensions with the same name, select the one coming from your HRIS data source.
**Expand by dimension** does not automatically create drivers when new attributes are added to a dimension. If you frequently add departments or other dimension values, update the model manually.
Copy the formula to the rest of the headcount drivers. Because the drivers and formulas reference the same dimension, the filters match each segment.
Create a **Total Headcount** driver and sum the segmented headcount drivers, the driver group, or the database directly.
If you have multiple dimensions with the same name, select the one coming from your HRIS data source.
**Expand by dimension** does not automatically create drivers when new attributes are added to a dimension. If you frequently add departments or other dimension values, update the model manually.
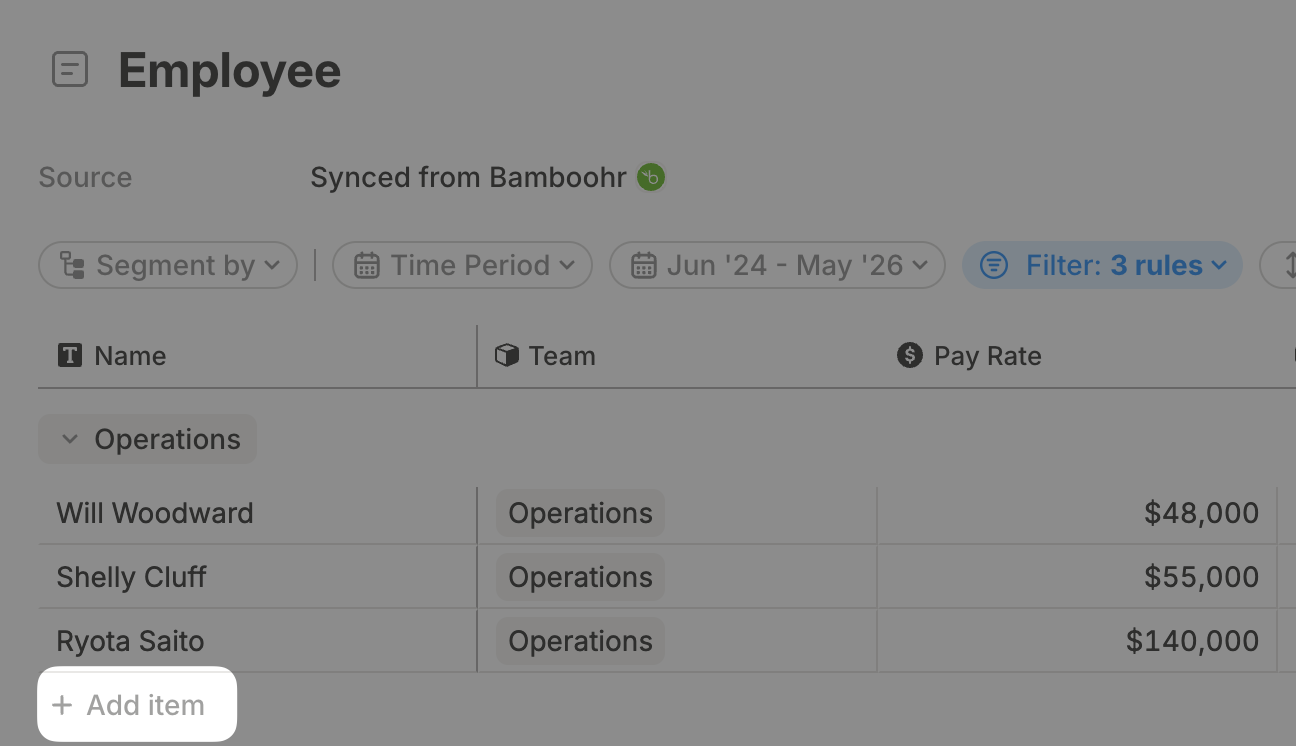
 ## Step 3: Add new employees
The easiest place to add new hires is the Employees database.
Click **+ Add Item** in the Employees database.
## Step 3: Add new employees
The easiest place to add new hires is the Employees database.
Click **+ Add Item** in the Employees database.
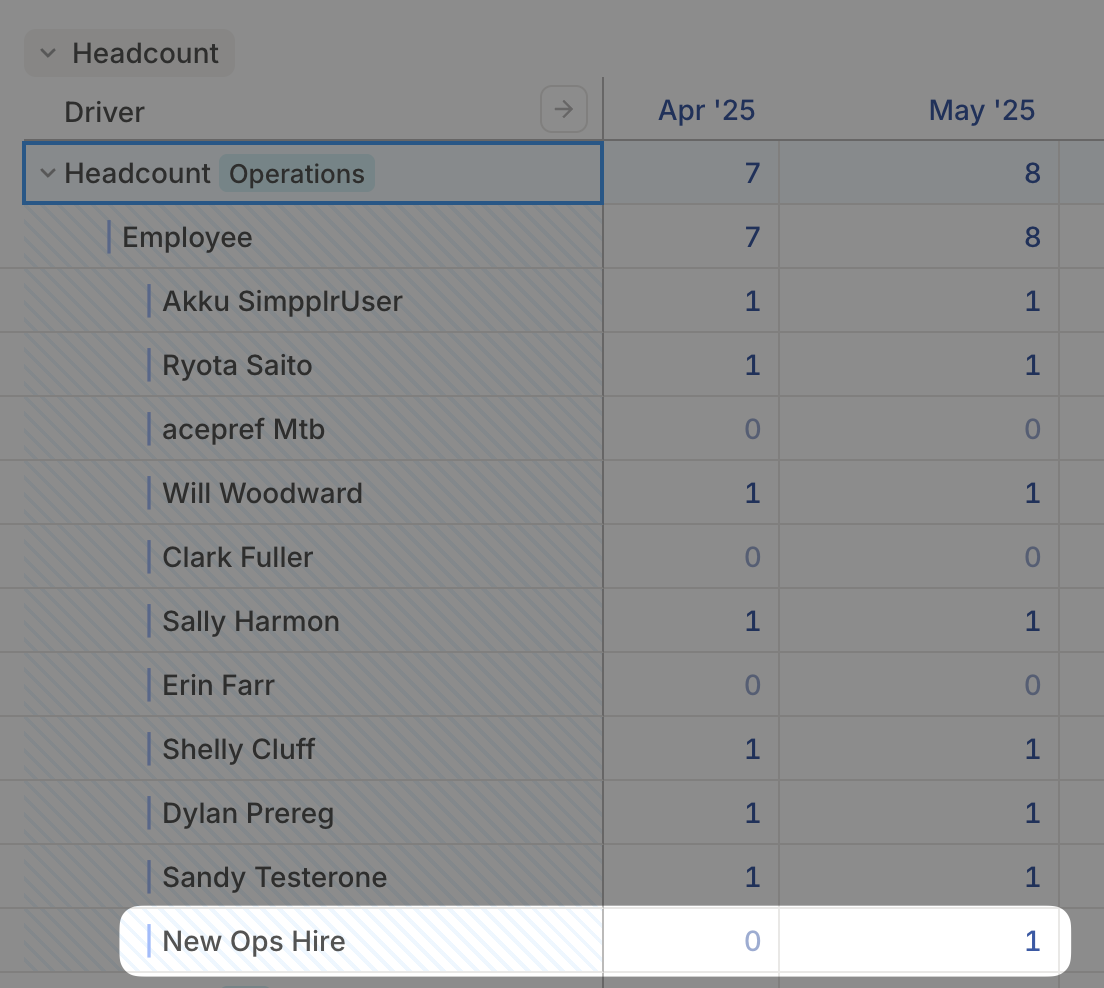
 Fill in the dimensions and dates used in your formulas, typically Department, Start date, and Termination date if relevant.
For new HRIS databases, check the rollup database for the correct department segment. For legacy HRIS databases, open the model, click the caret next to the headcount driver, and confirm the employee appears in the breakdown.
Fill in the dimensions and dates used in your formulas, typically Department, Start date, and Termination date if relevant.
For new HRIS databases, check the rollup database for the correct department segment. For legacy HRIS databases, open the model, click the caret next to the headcount driver, and confirm the employee appears in the breakdown.
 ## What's next
* [Prorated salaries](/guides/modeling/prorated-salaries)
* [FX rate](/guides/modeling/fx-rate)
* [Commissions](/guides/modeling/commissions)
## What's next
* [Prorated salaries](/guides/modeling/prorated-salaries)
* [FX rate](/guides/modeling/fx-rate)
* [Commissions](/guides/modeling/commissions)