Modifying forecasts and tagging plans
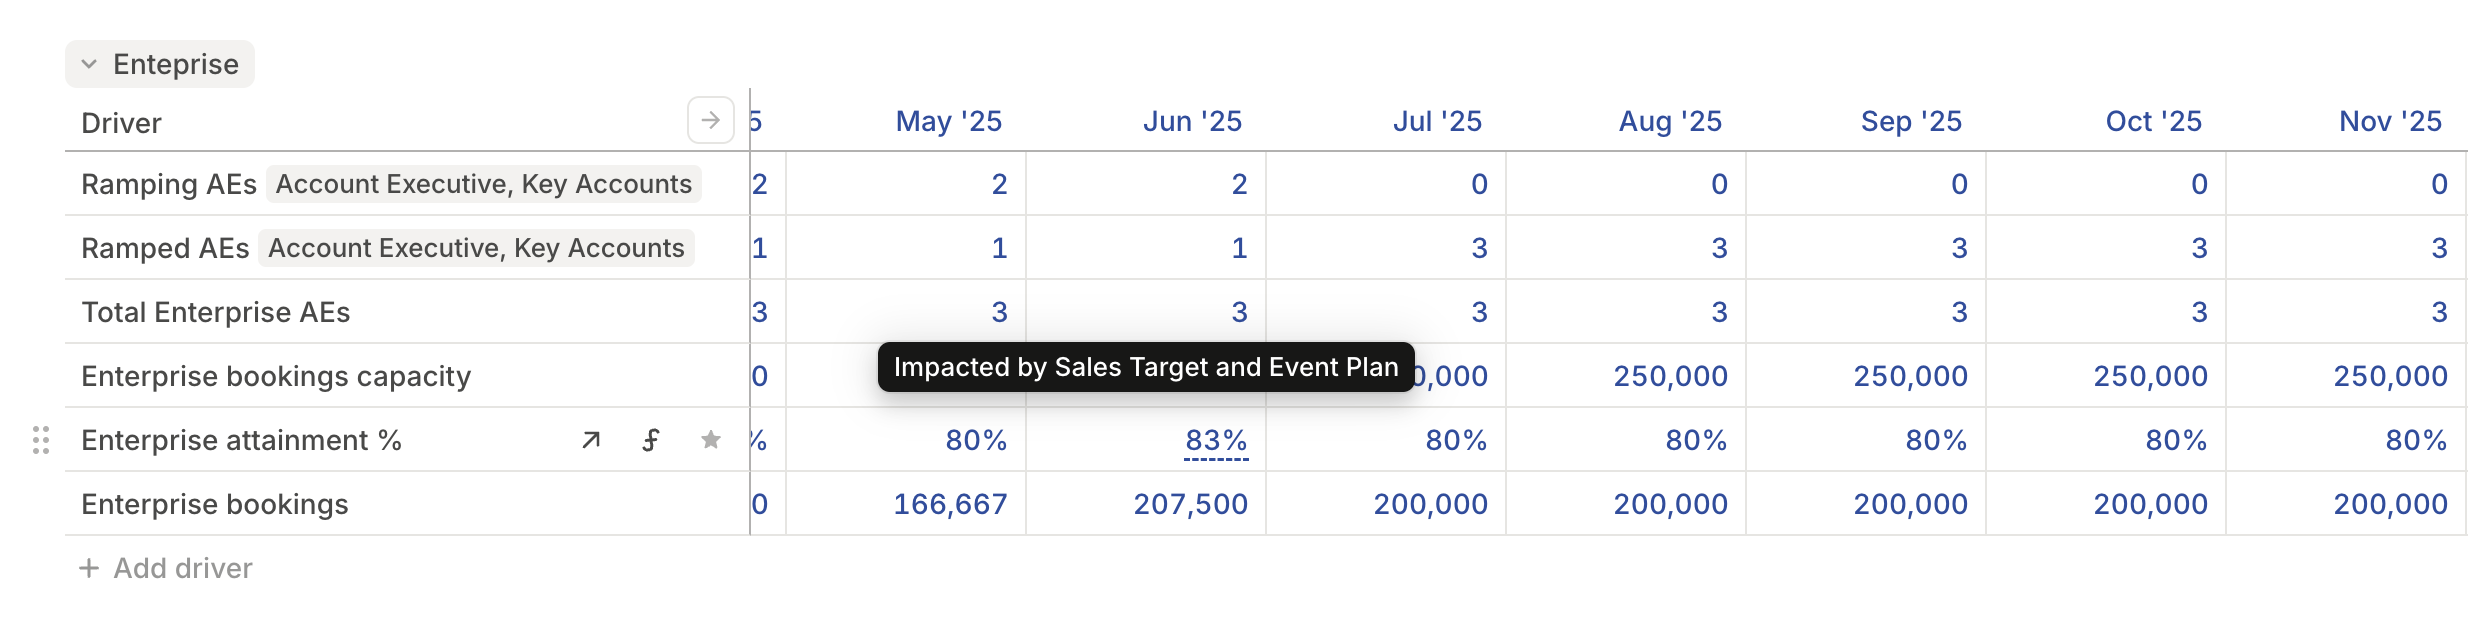
You can tag changes to time series values in a driver table, database, or driver detail view. This is useful when a forecast formula is mostly right, but a specific initiative changes one or more months.Select a forecast value
Select a value after your last close.
Edit the value
Edit the cell directly. You can replace the forecasted value, clear it, or use 
+ or - to add an adjustment on top of the formula value.Add multiple adjustments when needed
If multiple initiatives affect the same cell, add multiple adjustments so each can be tagged to a different plan.
If you modify a cell without tagging it, Runway assigns the change to the Default Plan. You can tag it later from the cell editor.
Connecting an employee’s start date to a plan
If you work in an Employees database generated from a supported HRIS integration, it includes a Start Date column by default.- Synced employees with a future Start Date are automatically tagged as part of your Default Plan.
- Manually added rows for future hires are also included in Default Plan when their Start Date is in the future.
Deleting a plan that originates from a new database row clears the Start Date for that object, but the row itself is not deleted.
Organizing plans
Group related plans together when the list gets long.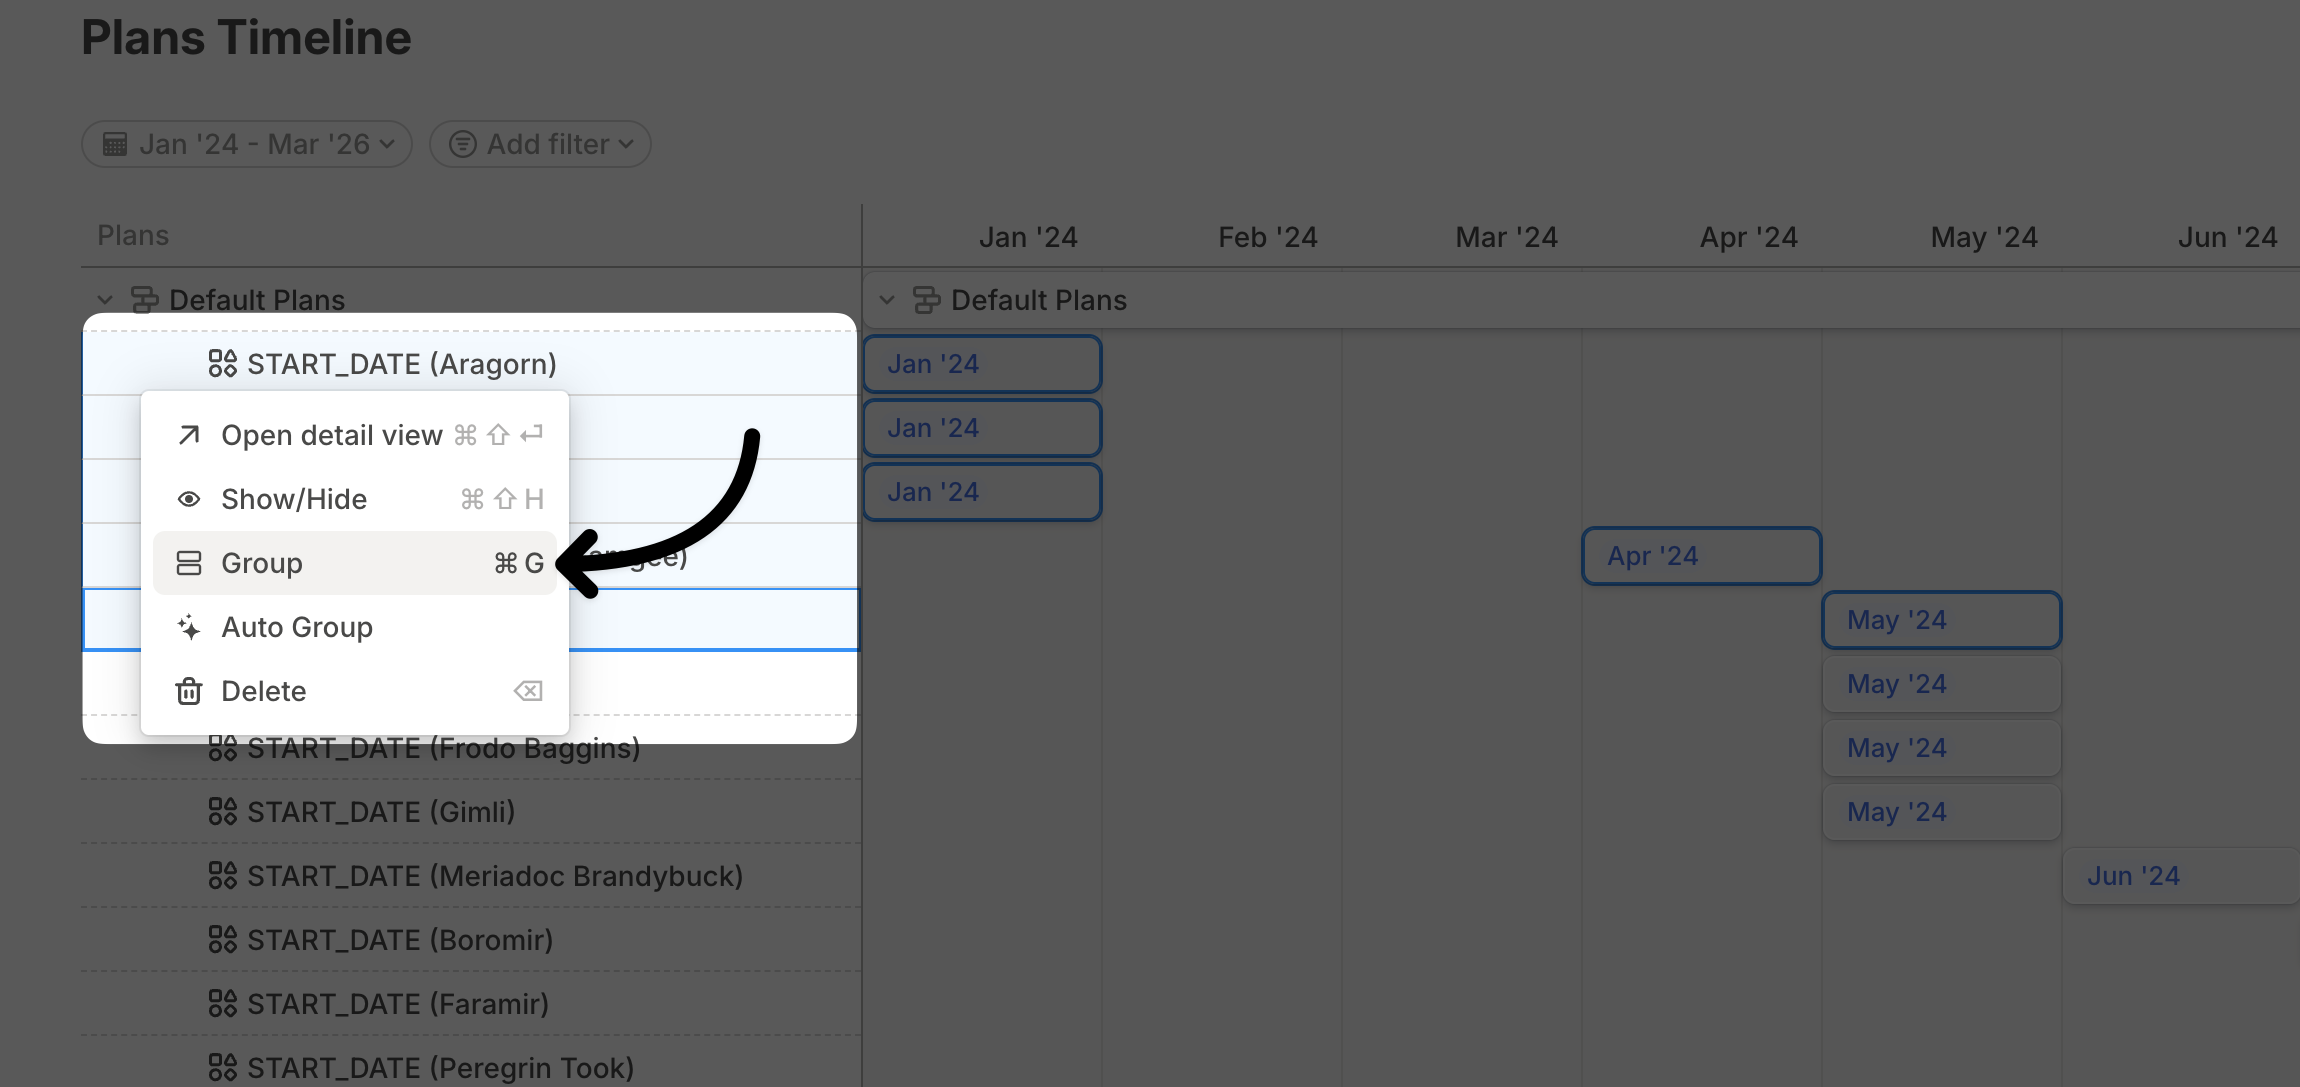
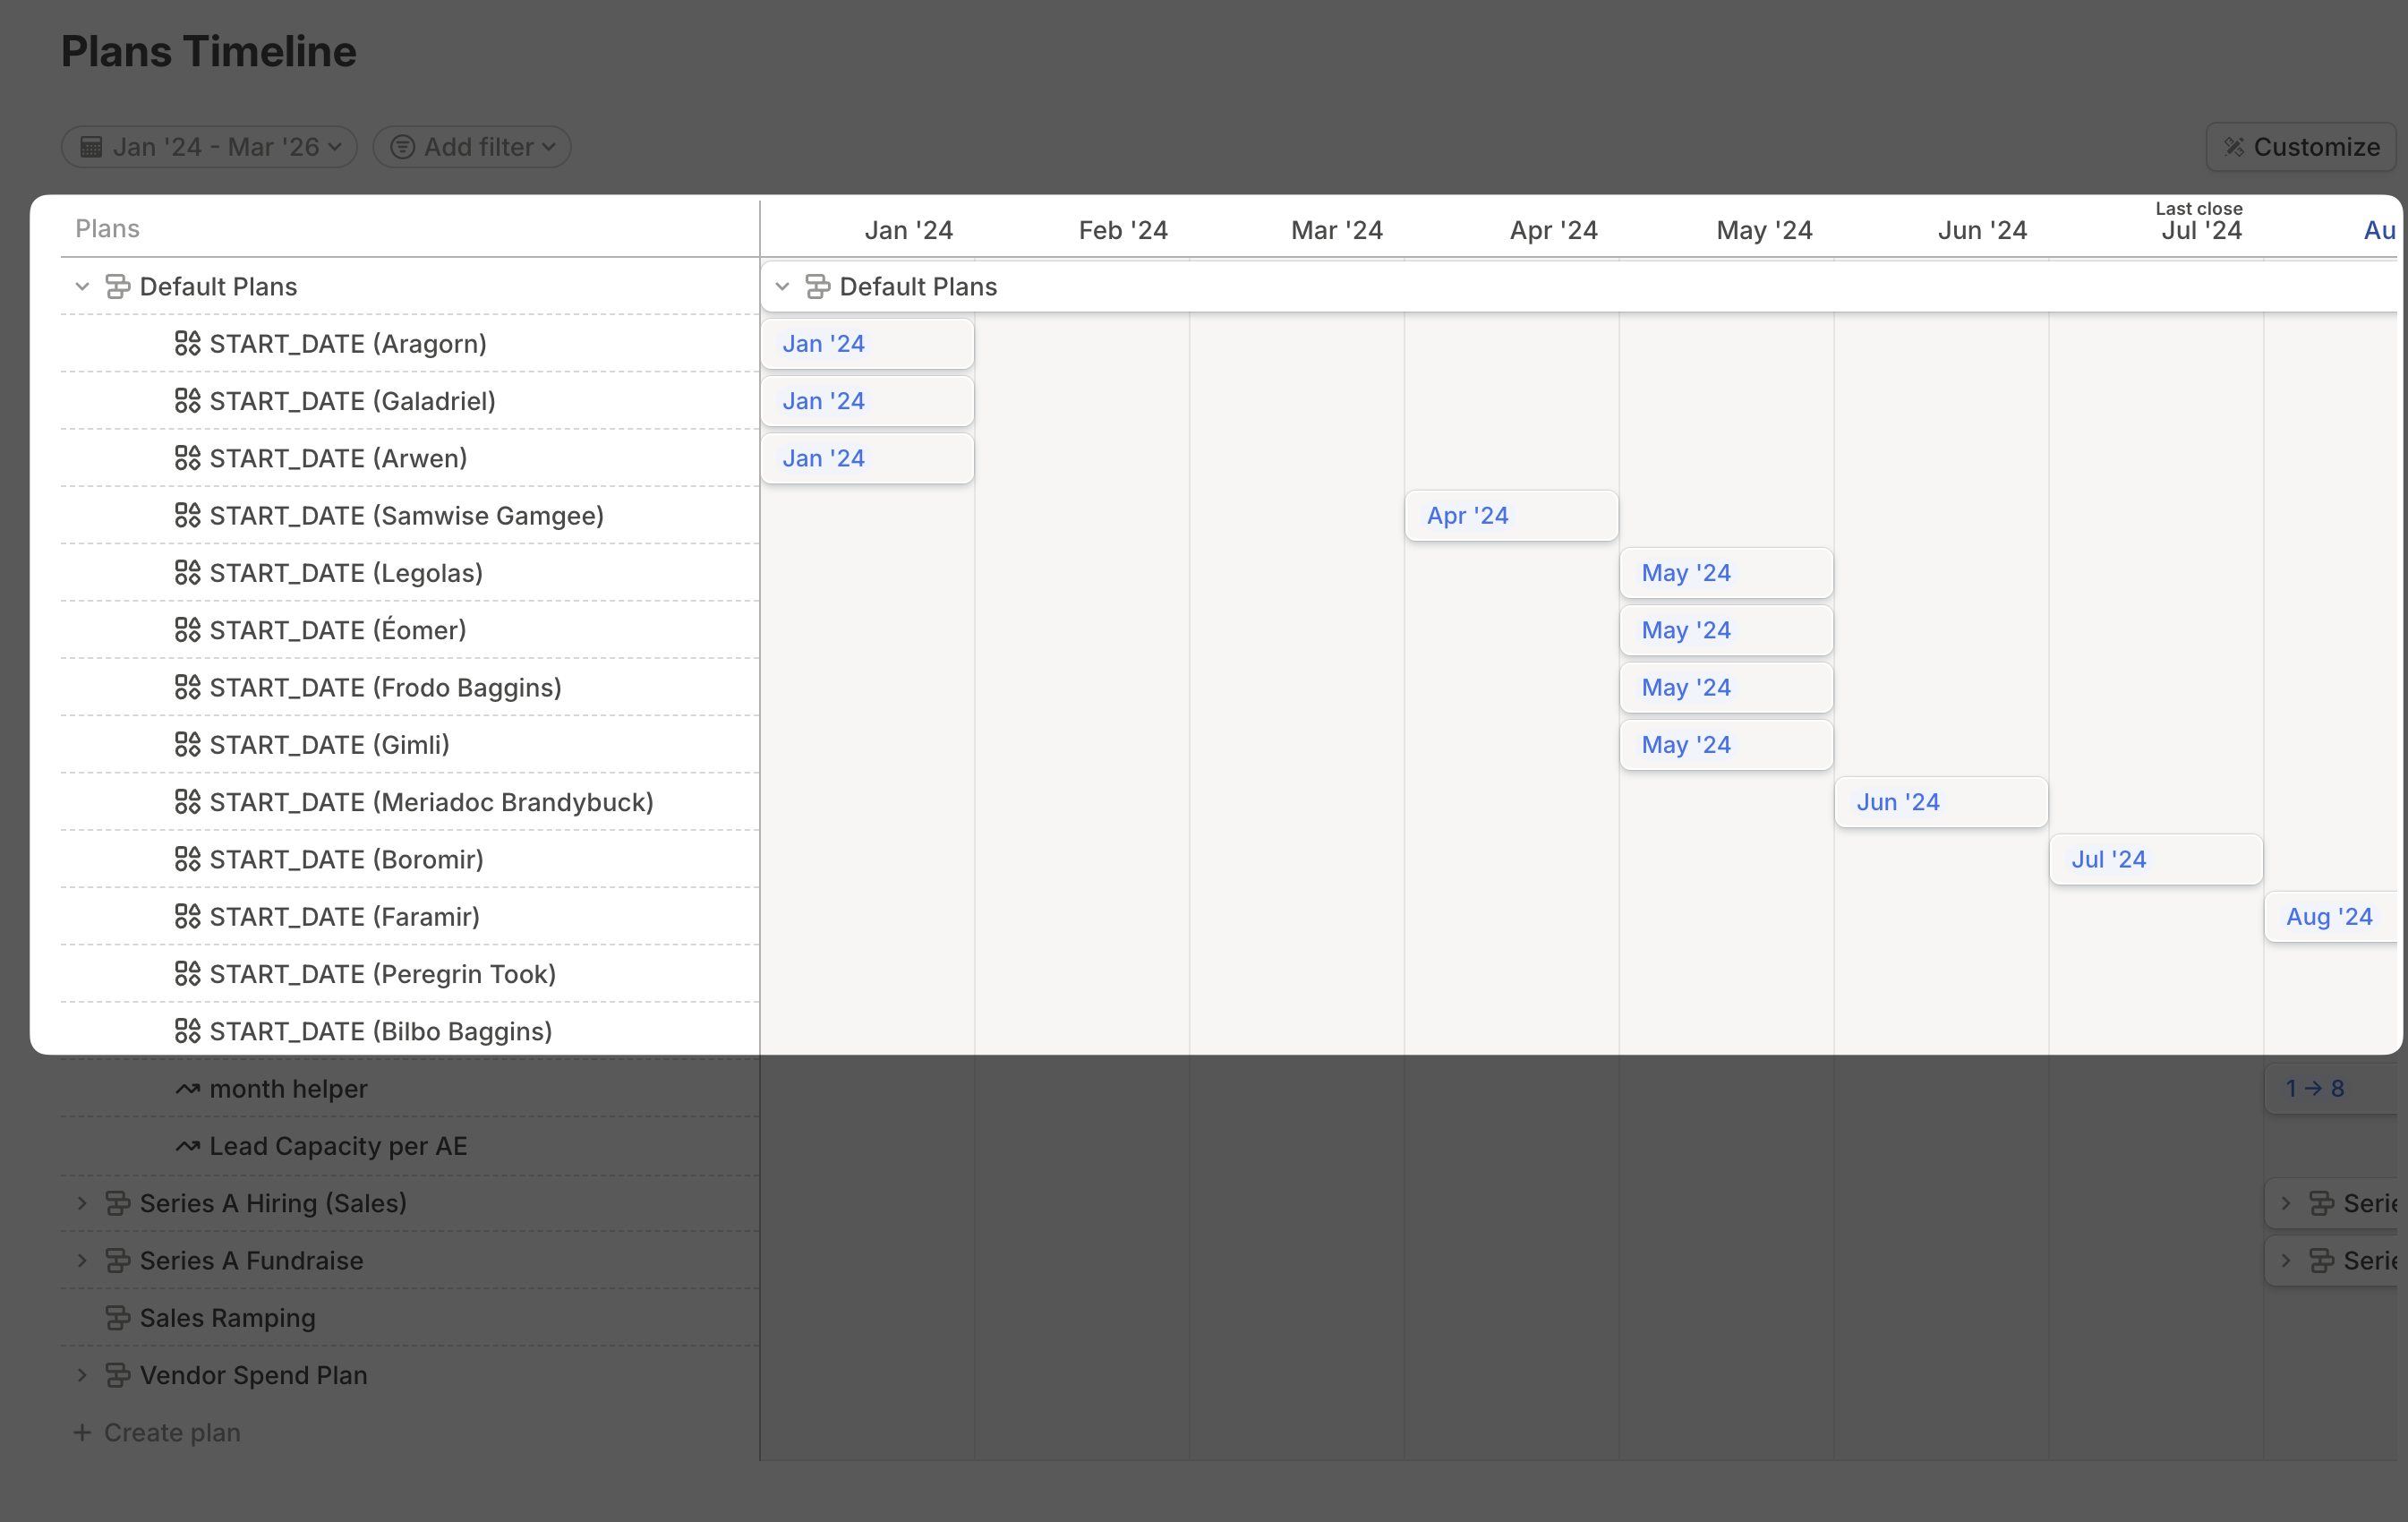
Surfacing plans in pages
Pages let you bring model context onto a shared canvas. A Plan timeline block shows plans in the current scenario.Filter plans
Apply filters to show the plans relevant to the page. You can filter by plan name, model, and more.
- Adjust plan values for a single month while leaving other months unchanged.
- Push a plan forward or backward in time.
- Stretch a plan across multiple months. If the plan uses
=, the value repeats across all months. If it uses+or-, the total impact is distributed.
Marking KPI drivers
Mark important drivers as KPIs when you want them to stand out in formulas and plan detail views.
Plan detail views include KPI drivers in KPIs impacted by plan when the plan affects them.
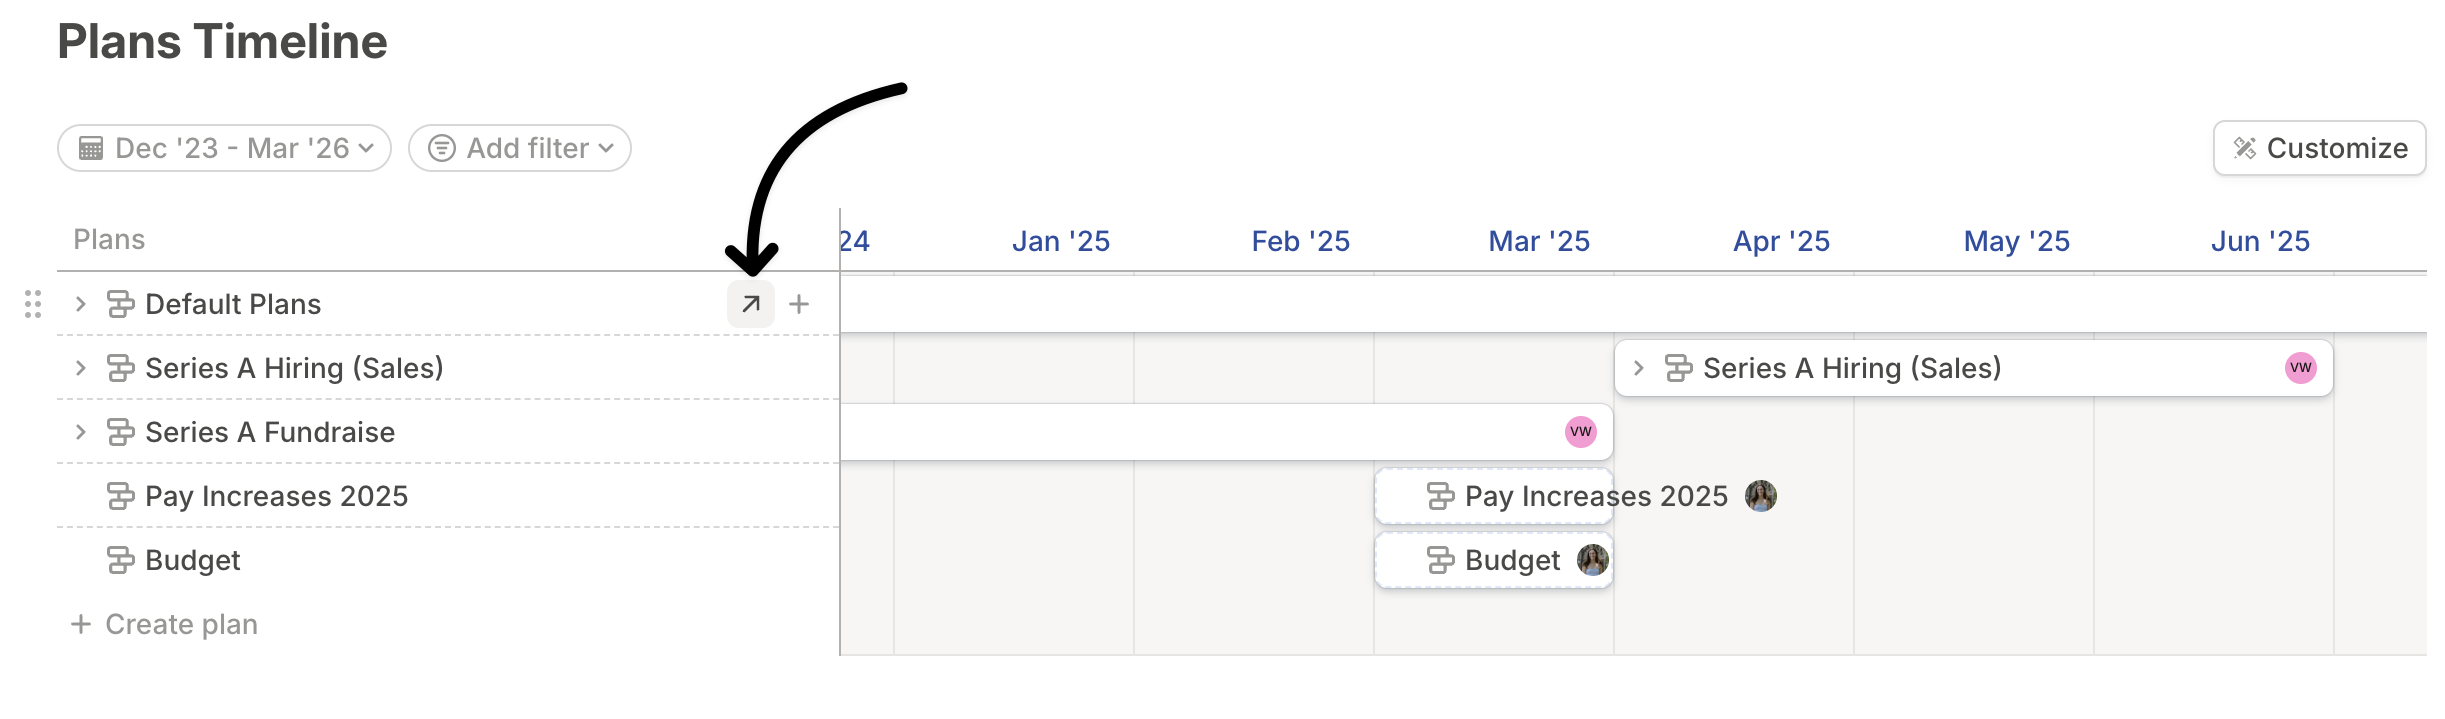
Accessing a plan’s details
Deleting a plan
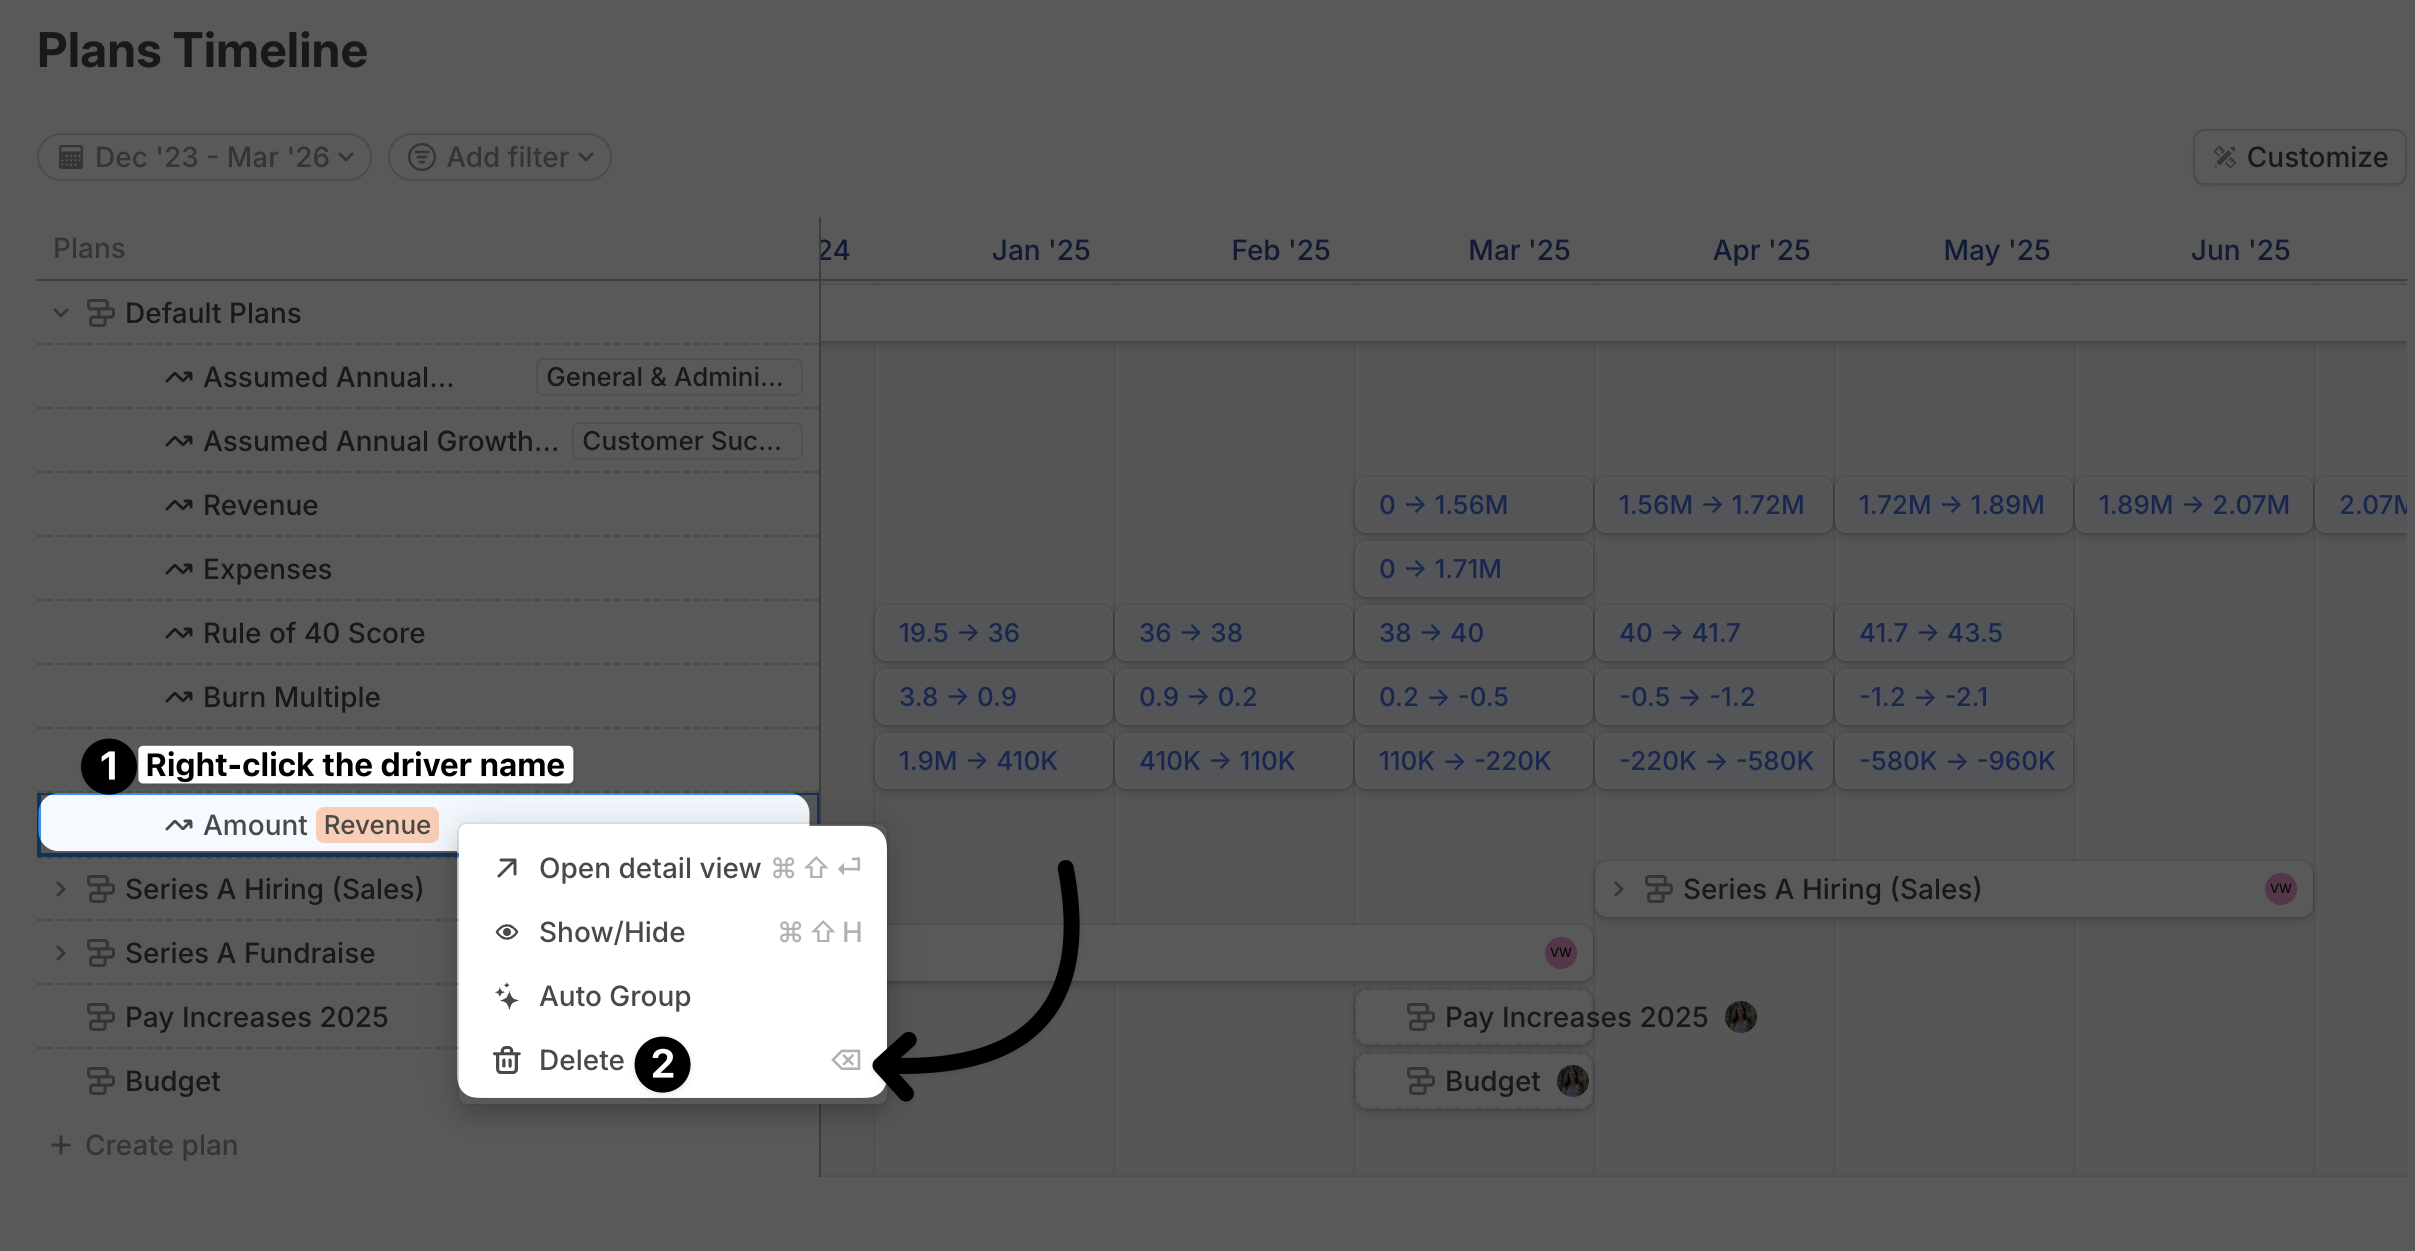
To delete a plan permanently, right-click its name and select Delete. In the details view, you can also click the delete icon.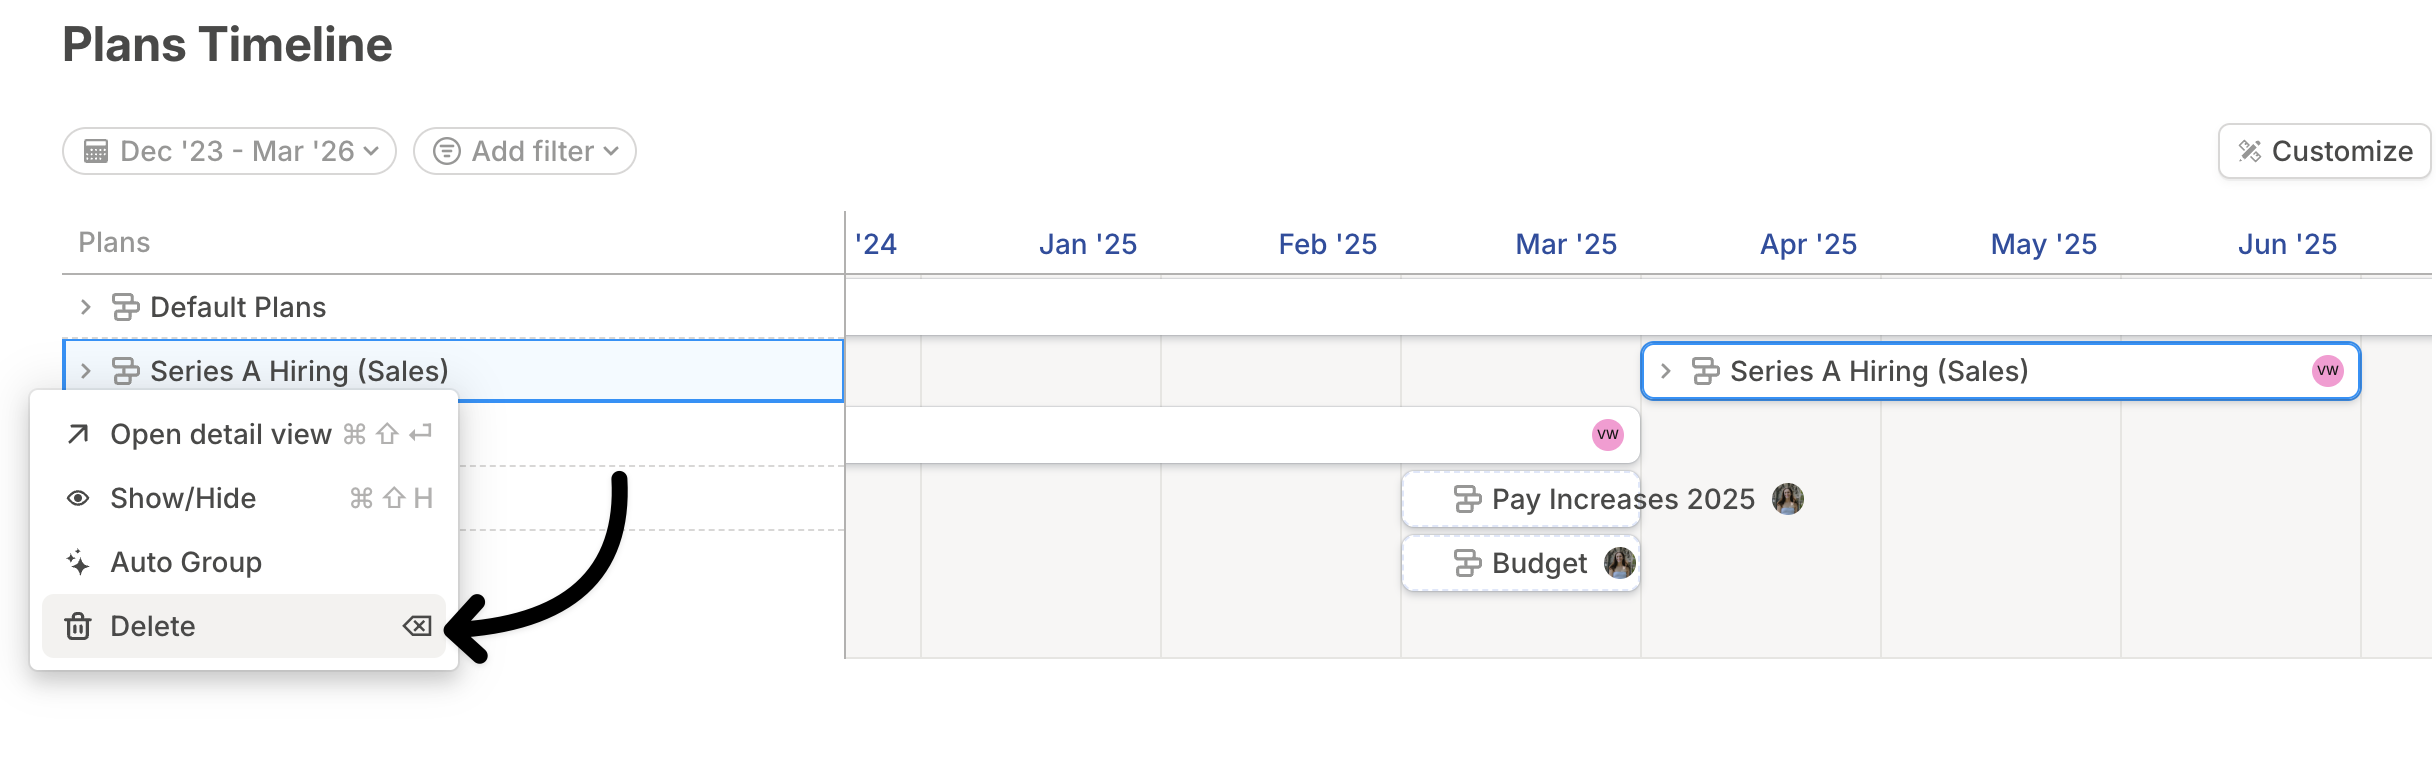
Plans FAQ
Could moving my Last Close date forward delete my plans?
Could moving my Last Close date forward delete my plans?
No. Plans remain available in Runway after you move last close.Whether a plan affects a visible cell depends on what else applies to that month. Runway checks hardcoded values, actuals formulas, integration data, plan hardcodes, and forecast formulas according to the formula and last-close rules for that driver.