Documentation Index
Fetch the complete documentation index at: https://docs.runway.com/llms.txt
Use this file to discover all available pages before exploring further.
NetSuite already has robust support for multi-entities, typically this works out of the box with our Income Statement & Balance Sheet templates as the Subsidiary is already included.
How it works in Runway
Runway allows you to connect multiple instances of most integrations—including duplicate QuickBooks or Xero accounts. Once the connections are established, our CX team will work with you to label each entity appropriately and combine the data into a single database on your behalf.The SQL behind multi-entity
Our team is happy to handle this setup for you—especially if you’re not comfortable with SQL. But if you’re curious how it works or want to do it yourself, read on. In this example, we’ll walk through combining multiple QuickBooks Online entities using SQL. The same approach applies for Xero.- Follow the Fivetran setup guide for QuickBooks and install the standard QuickBooks Template to set up your first entity.
-
Install the integration for each additional entity, but don’t apply the template again. When prompted for a schema name, use a unique identifier for each entity (e.g.,
quickbooks_us,quickbooks_ltd).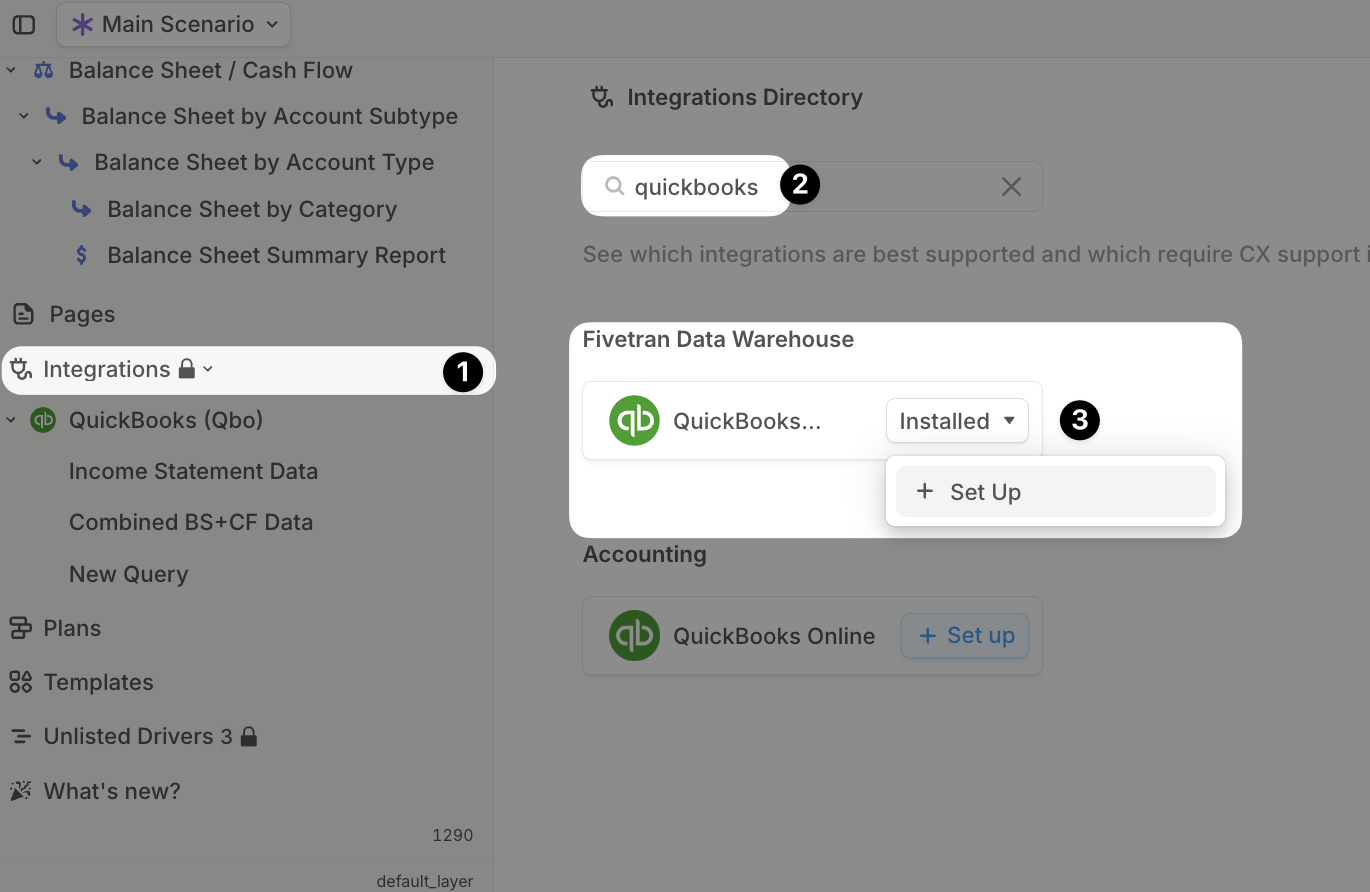
-
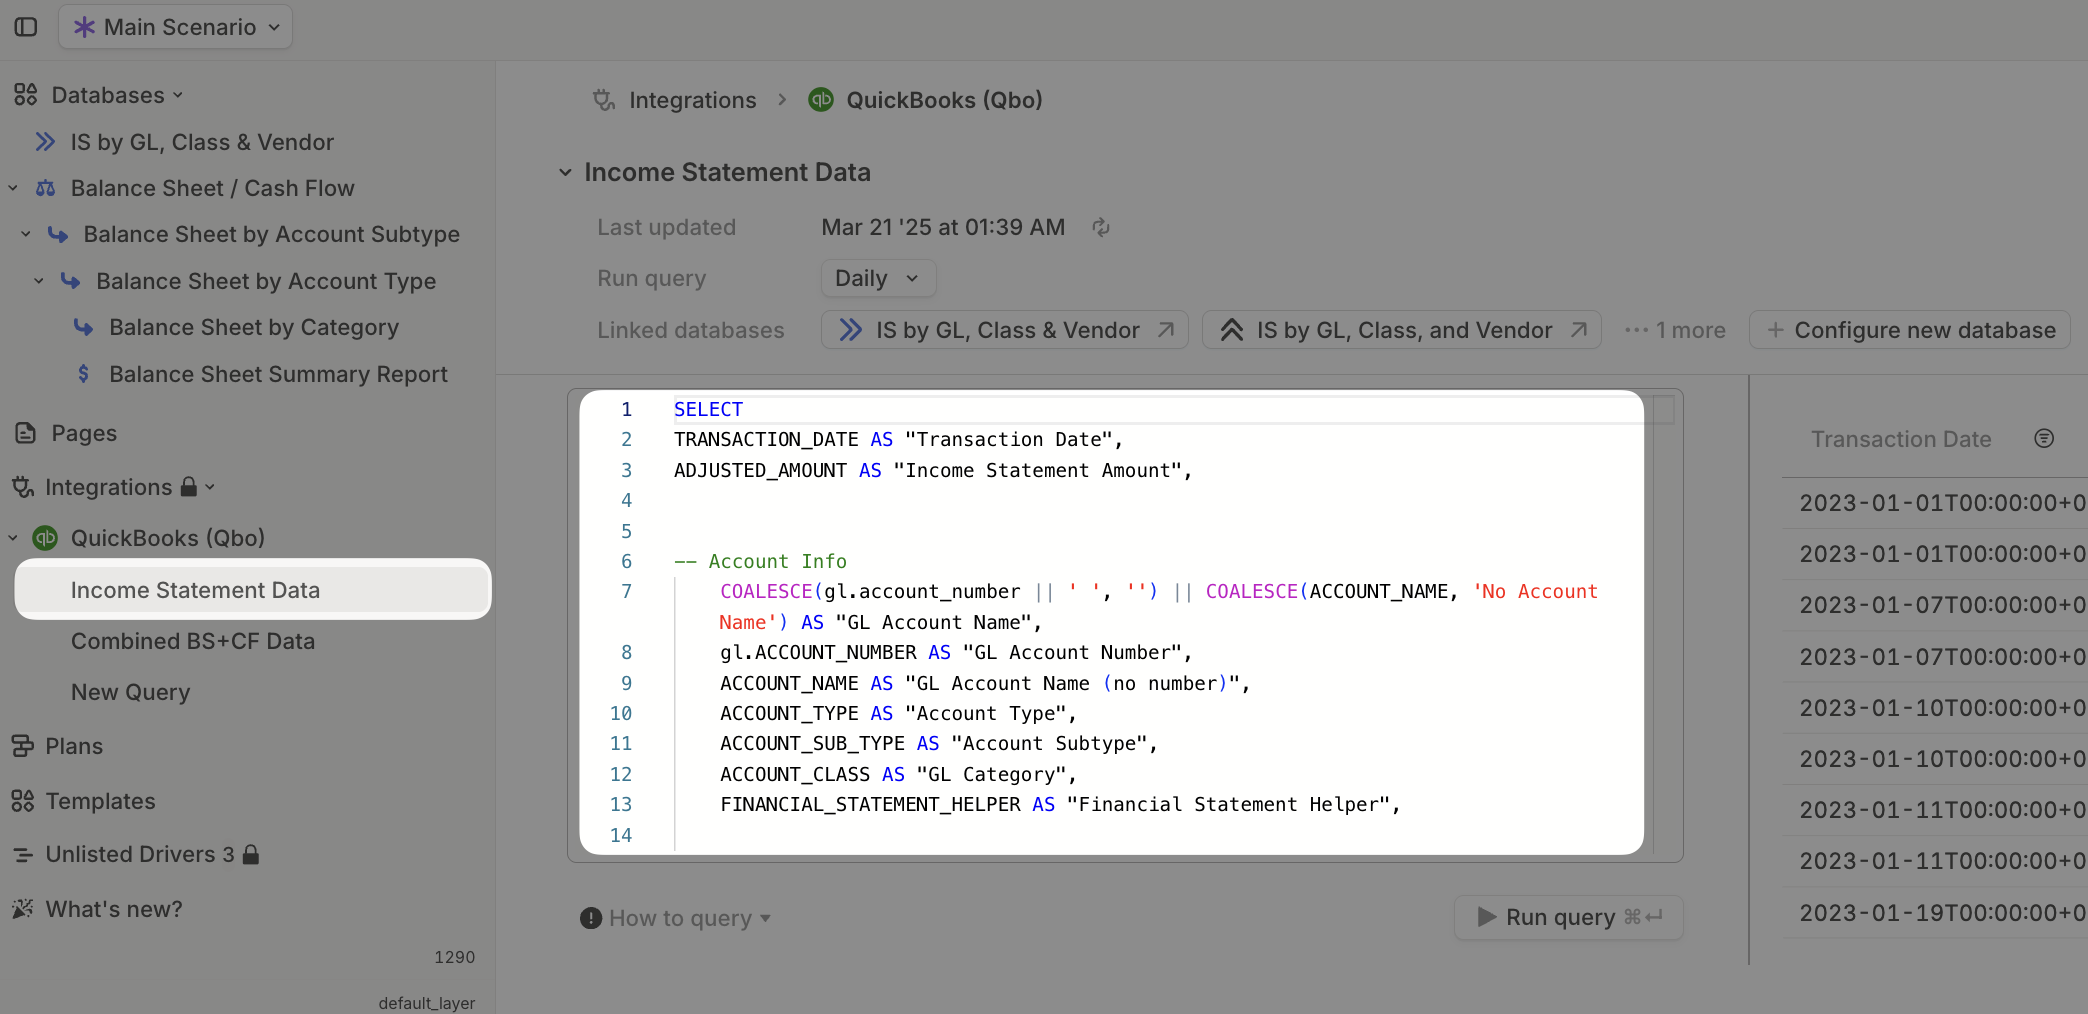
After completing the setup, locate the Income Statement Data query from the template installed in the first step.
-
We will need to edit this query to combine each Quickbooks Online data source and insert the matching subsidiary as a new column. Here’s an example code snippet of how to accomplish this. The key pieces to note are:
- You’re writing one SELECT per schema.
- You’re tagging each row with a subsidiary name.
- You’re combining them with UNION ALL.
-
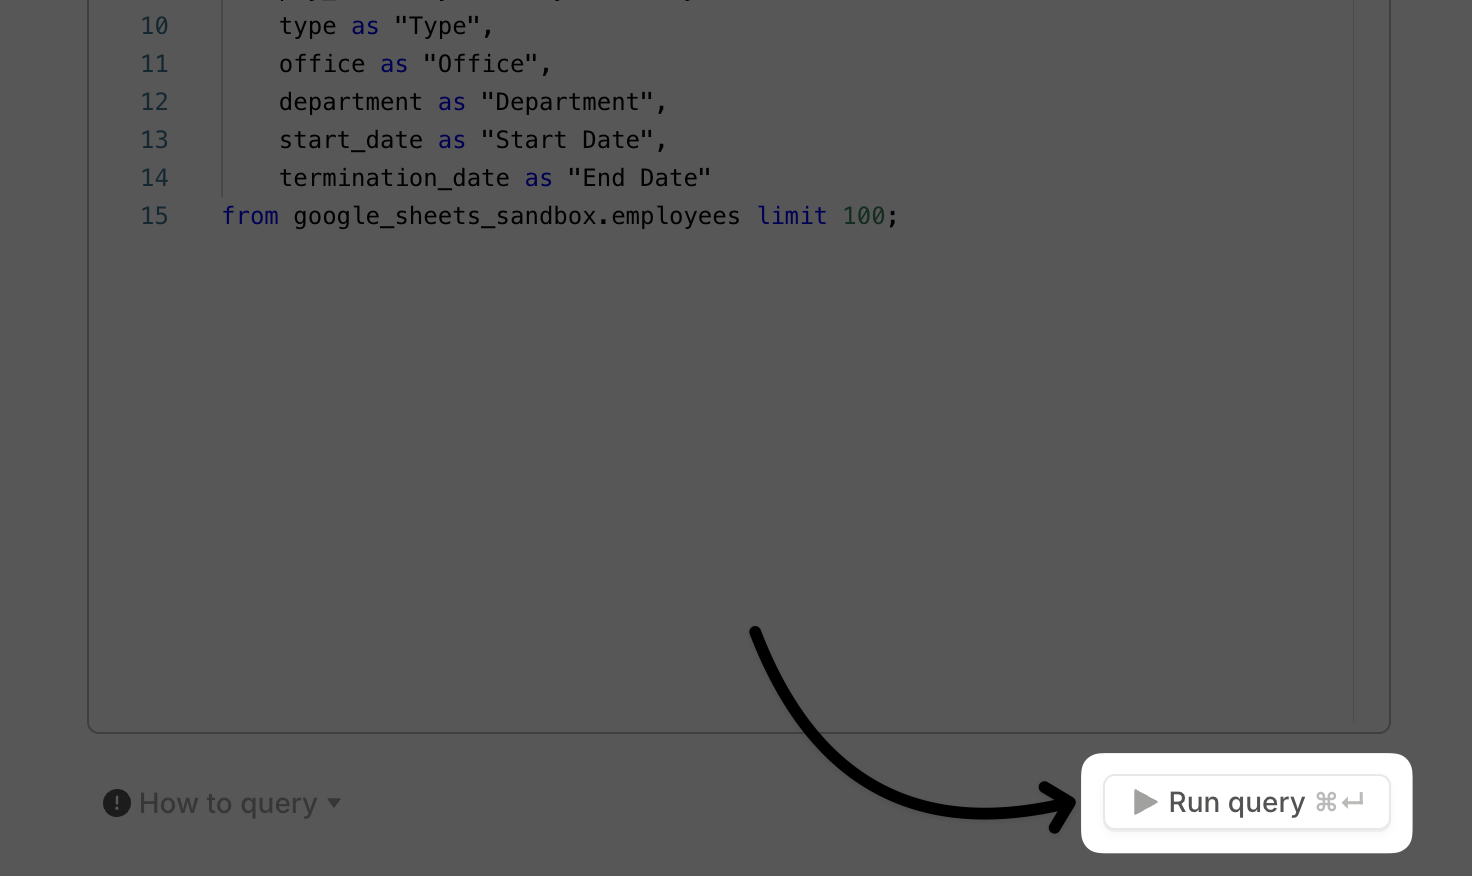
Paste your updated SQL into Runway’s SQL editor and click Run query to make sure everything runs as expected.
-
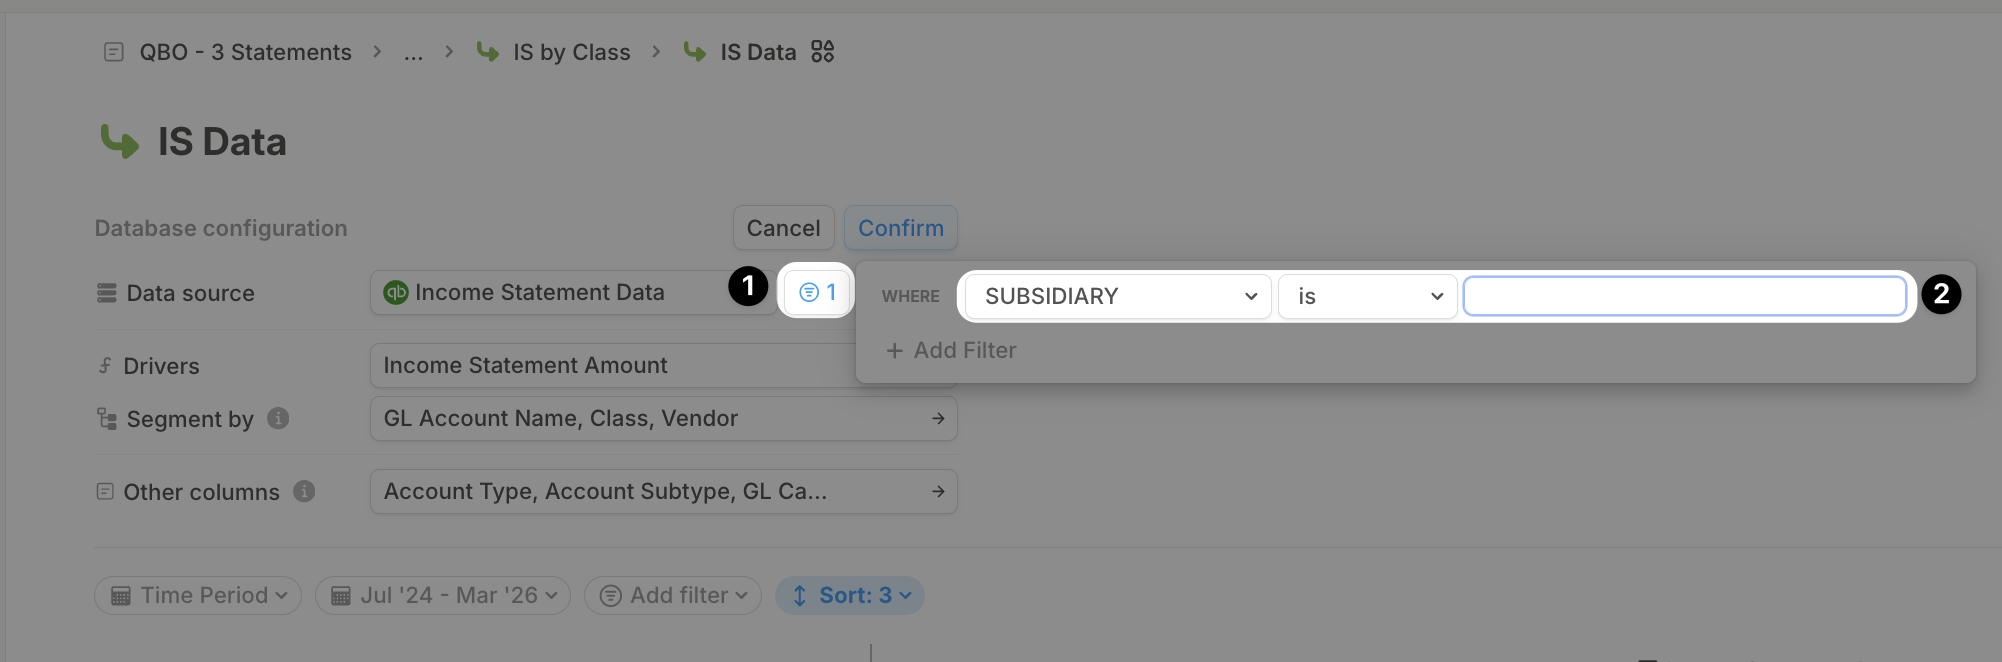
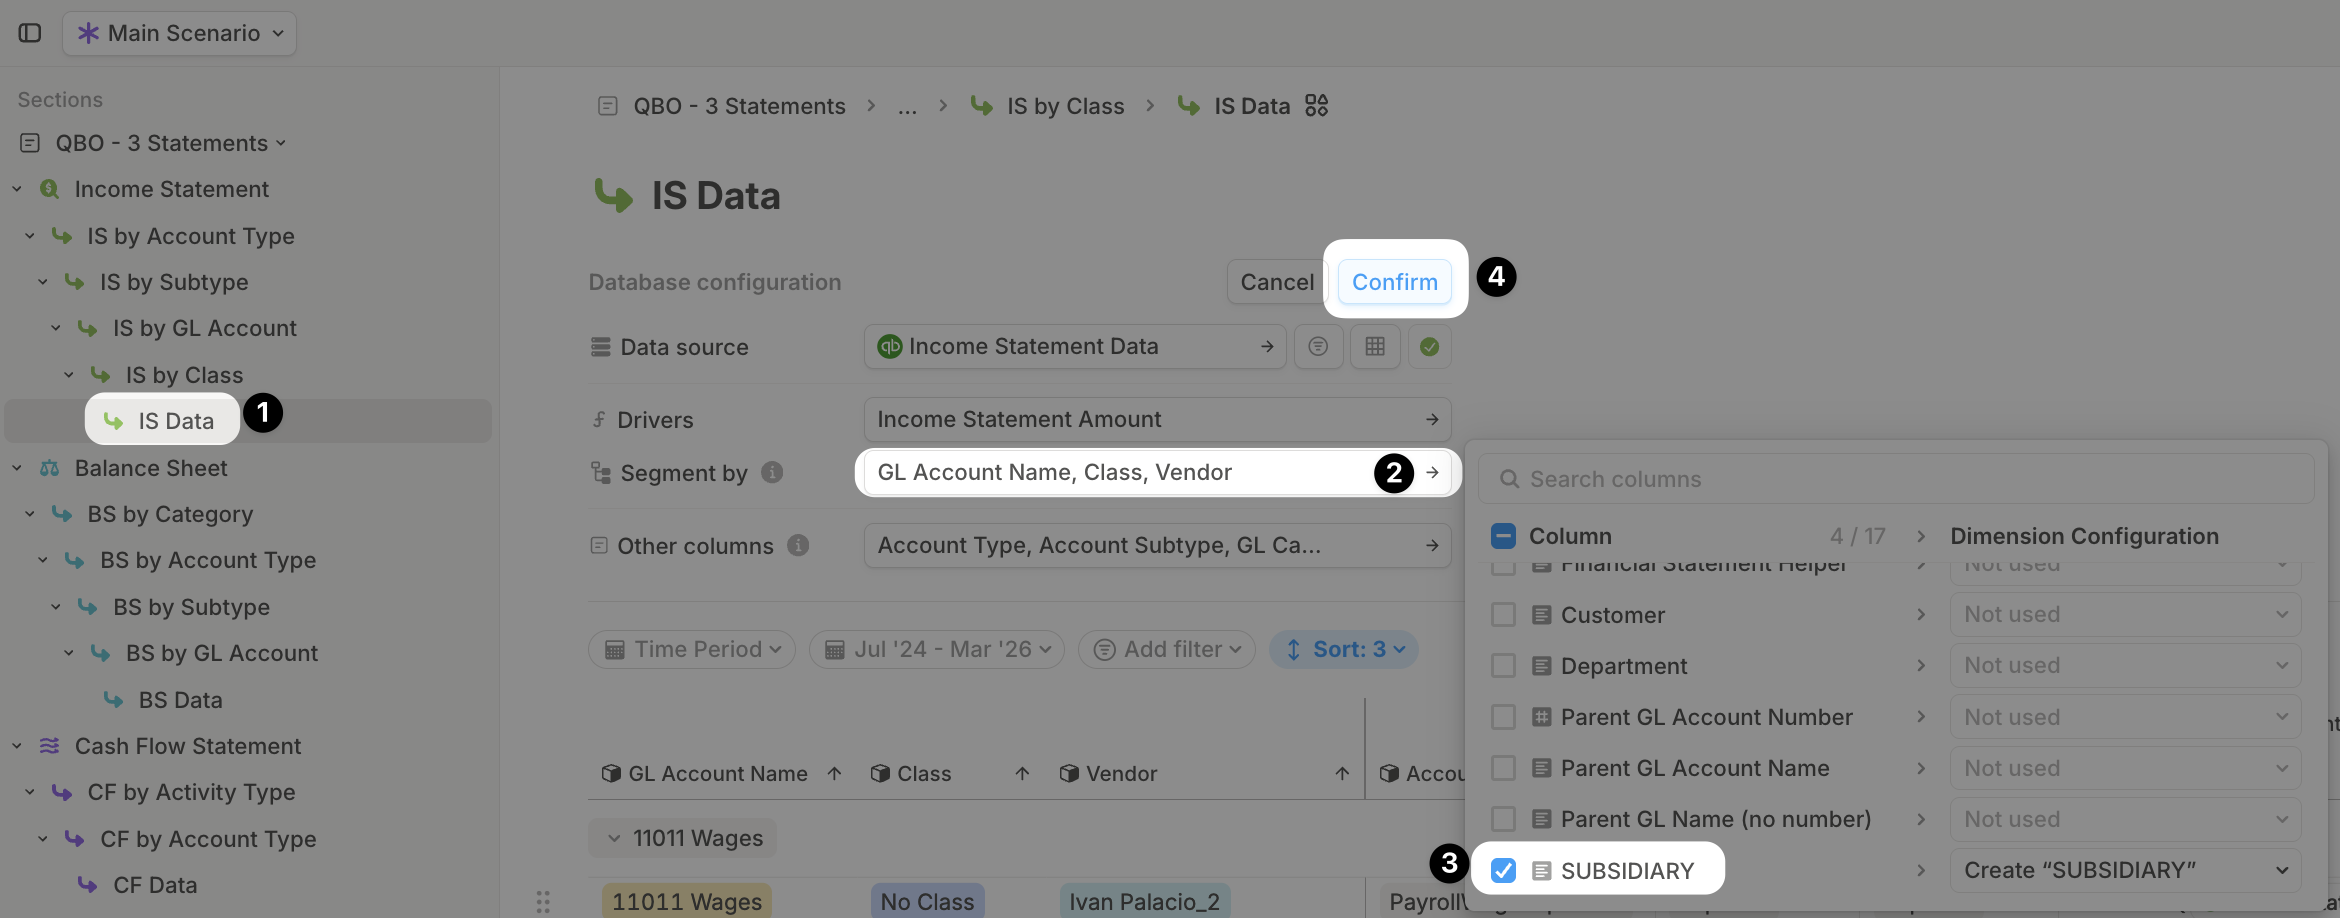
The final step is to add the new Subsidiary field to the shaped database. Navigate to the database connected to your Income Statement (labeled IS data if you used the template), click Edit, select the dropdown next to Segment by, and check Subsidiary > Confirm.
- That’s it! You can apply the same process to consolidate your Balance Sheet and Cash Flow databases.
Intercompany eliminations
When you combine multiple entities into a single dataset, what you’re really creating is a combined view—not a fully consolidated one. To build a true consolidated P&L, you’ll often want to exclude intercompany eliminations so those transactions don’t artificially inflate your totals. The simplest way to handle this in Runway is by:- Creating a lookup table that maps each GL account to a new dimension—something like
Elimination TypeorIs Intercompany. - In that dimension, flag whether each account should be treated as an intercompany elimination.
- When building your consolidated P&L, just add a filter to exclude any rows where the account is flagged as an intercompany elimination.
- When building subsidiary-level P&Ls, you can ignore that flag entirely—this gives you the flexibility to report both combined and entity-level.
Multi-entity FAQ
Can I consolidate entities from different accounting systems (for example, Google Sheets, QuickBooks Online, and Xero)?
Can I consolidate entities from different accounting systems (for example, Google Sheets, QuickBooks Online, and Xero)?
Yes. You can connect each system to Runway using our Fivetran integration, then follow the SQL pattern outlined above to consolidate the data.Keep in mind: these systems often use different table names, column names, and schemas. You’ll need to carefully map the equivalent fields from each source into a common structure. This requires a bit of SQL proficiency.Need help? Our CX team is happy to support you through the process.
I have a query with multiple entities combined. How do I configure a database to only include data from one entity?
I have a query with multiple entities combined. How do I configure a database to only include data from one entity?
- Open the database → click Edit.
- Add a filter on the entity/subsidiary column.
- To filter for a single entity, just enter its exact name.
- To include multiple entities, use comma-separated values without spaces, like:
business1,business2,business3.