Documentation Index
Fetch the complete documentation index at: https://docs.runway.com/llms.txt
Use this file to discover all available pages before exploring further.
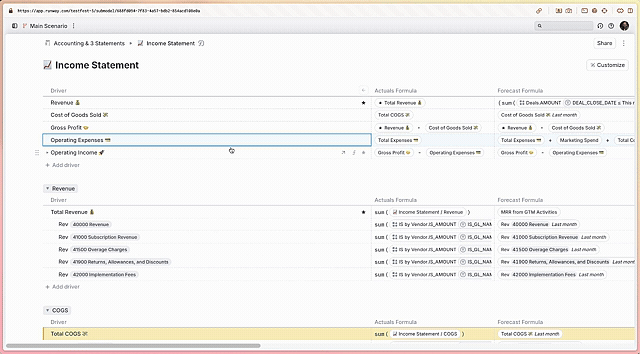
How to use drill-ins
To drill into a driver in a driver table:- Press
Cmd/Ctrl + Enterto toggle the drill-in state. - Or, right-click the driver name and select Drill in.
- Or, hover over the driver name and click the toggle caret that appears.
- A gray keyline indicates the input comes from actuals formulas.
- A blue keyline indicates the input comes from forecast formulas.
- Click the toggle caret on the expanded driver.
- Press
Cmd/Ctrl + Enteron the root expanded driver. - Press
Cmd/Ctrl + Option/Alt + Enteron a striped input line to collapse its parent.
Drill-ins support multiple levels of depth—expand an input line further to see its underlying dependencies.
Drill-ins permissions
Drill-ins follow the same permissions as the driver detail pane:- Admins → Can drill in freely across the entire model.
- Managers & Members → Can see direct (first-level) inputs but cannot drill further into drivers they don’t have access to.
- Guests → Cannot use drill-ins.
Important notes
Drill-ins are saved per user
- Expanding drill-ins only affects your own view—others won’t see the expanded state unless they do it themselves.
- This allows multiple users to explore without disrupting each other’s workflow.
- We’re considering ways to share drill-in states, so let us know if this would be useful.
Want others to see a breakdown?
If you want other users to view the same expansion:- Guide them to use the drill-in feature themselves
- Explicitly add selected drill-in drivers to the block:
- Select the expanded drill-in drivers
- Press
Cmd/Ctrl + Shift + Bor right-click → Add to block