- Data-source powered lookup (Recommended) – Best suited when the dimensions you’re referencing already come in via a data integration. This ensures new dimensions automatically flow through to your lookup.
- Fully user-created lookup – Useful only when the referenced dimension doesn’t exist in your data sources and must be manually created in Runway.
Data source-powered lookup (Recommended)
-
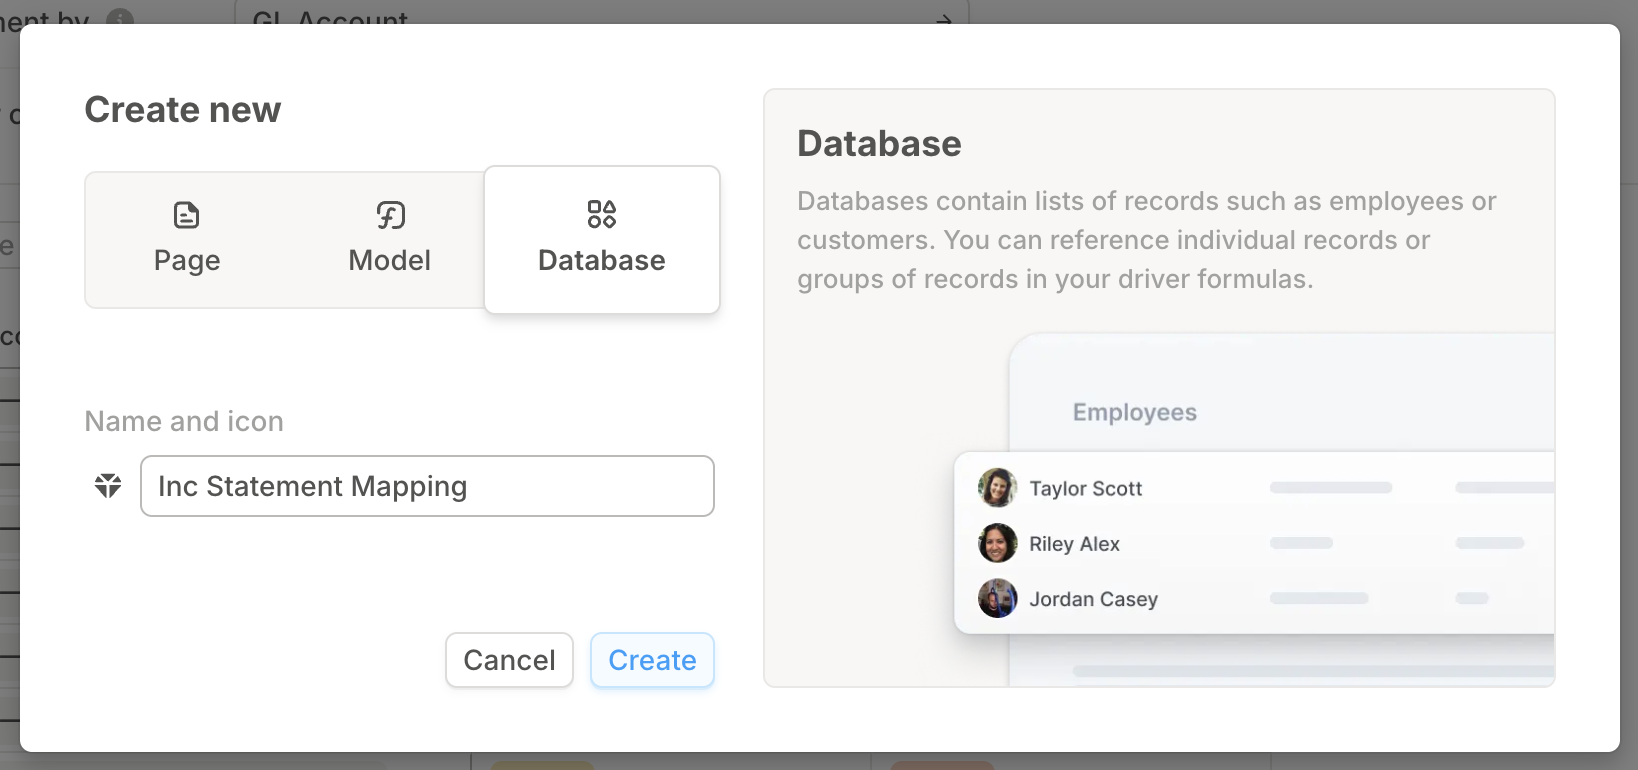
Create a new database where the lookups will be set.
-
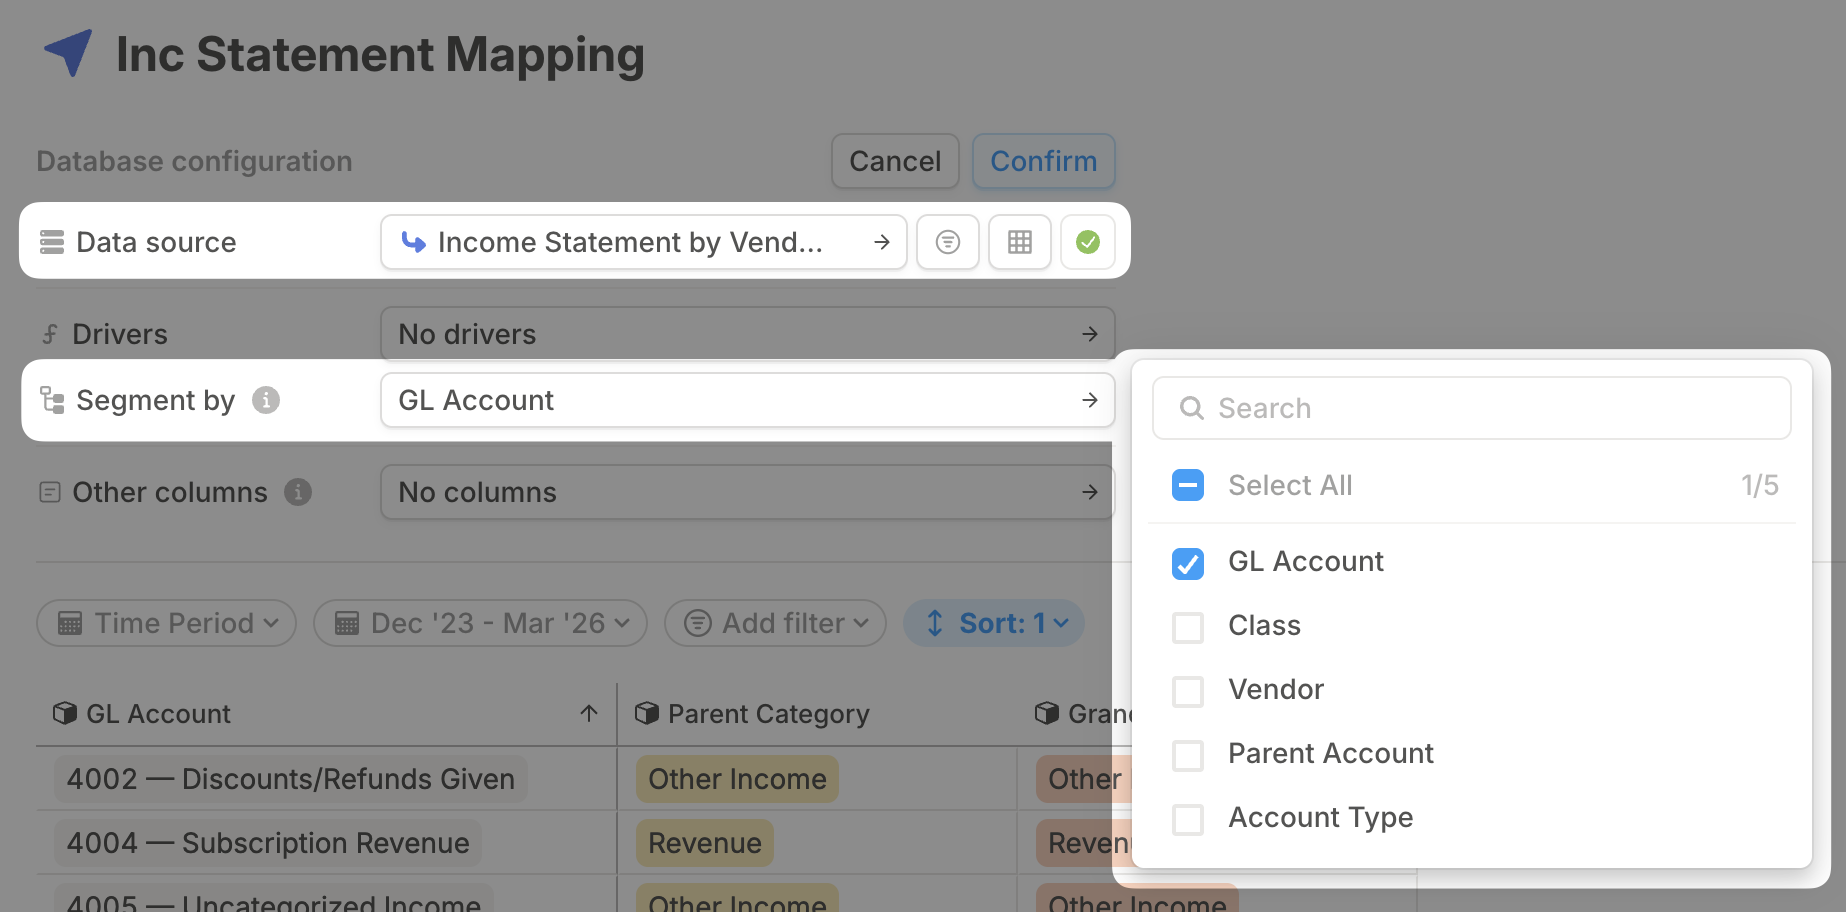
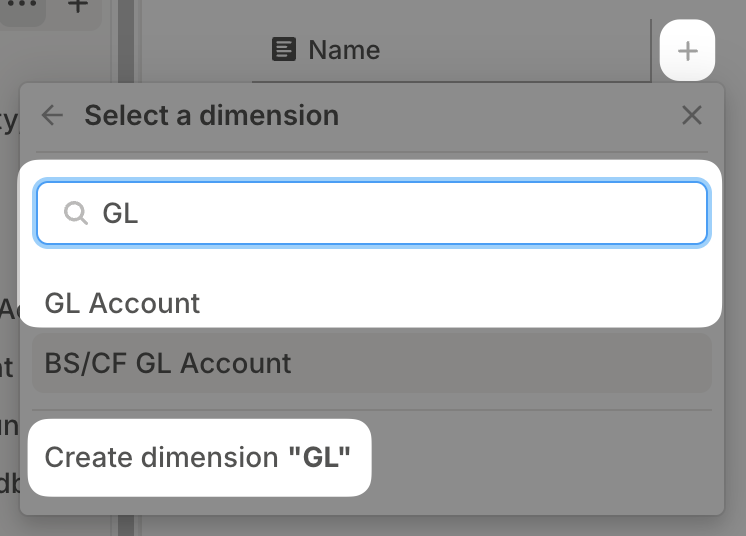
Open the database configuration menu and choose the appropriate Data source and Segment to drive your mapping. This is usually the most granular database that holds the values you want to map. In this example, we’re mapping GL Accounts to a Parent Category and will use the most granular database (driven by the accounting system) that contains all GL Accounts.
-
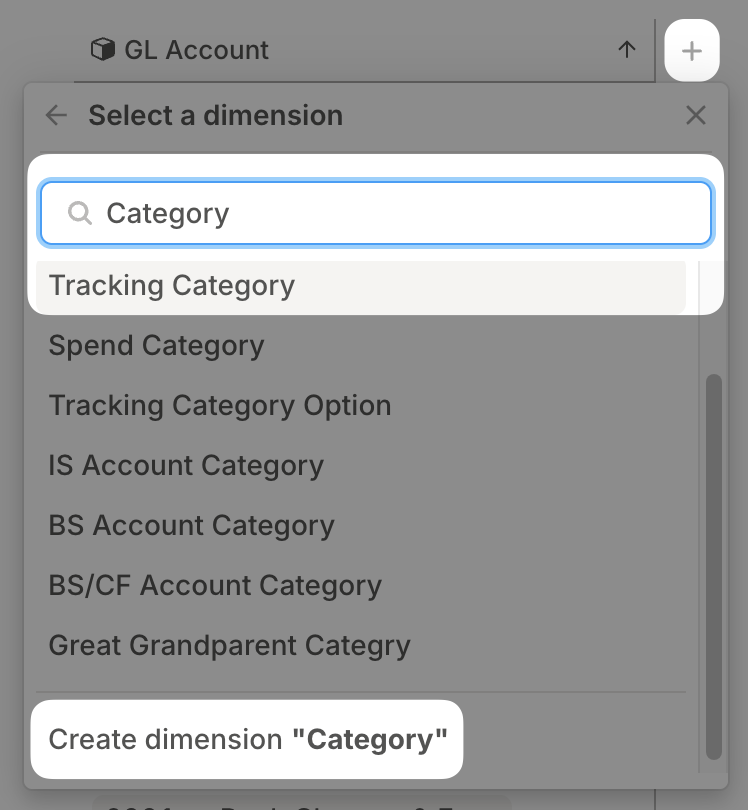
After confirming your selection, the chosen segment (e.g. GL Account) will populate as column in the database. Click the + icon in the database header, select Dimension, and choose an existing dimension or create a new one. This is your lookup value — what you’ll use in other databases based on the segment that you set in Step 2.
-
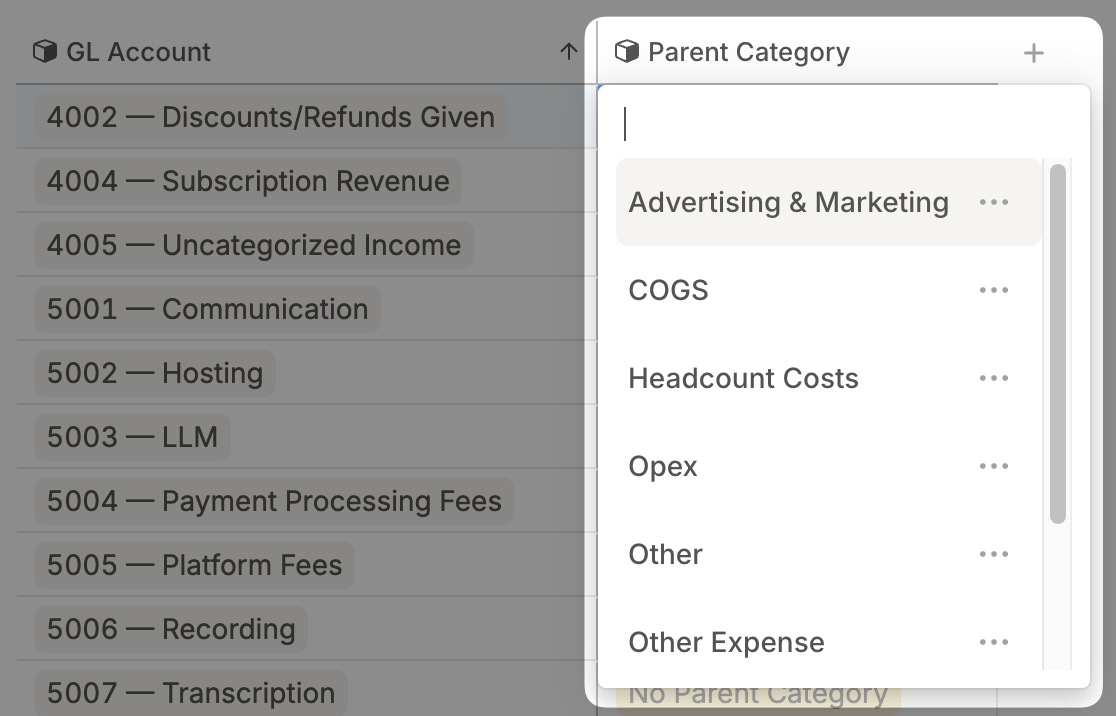
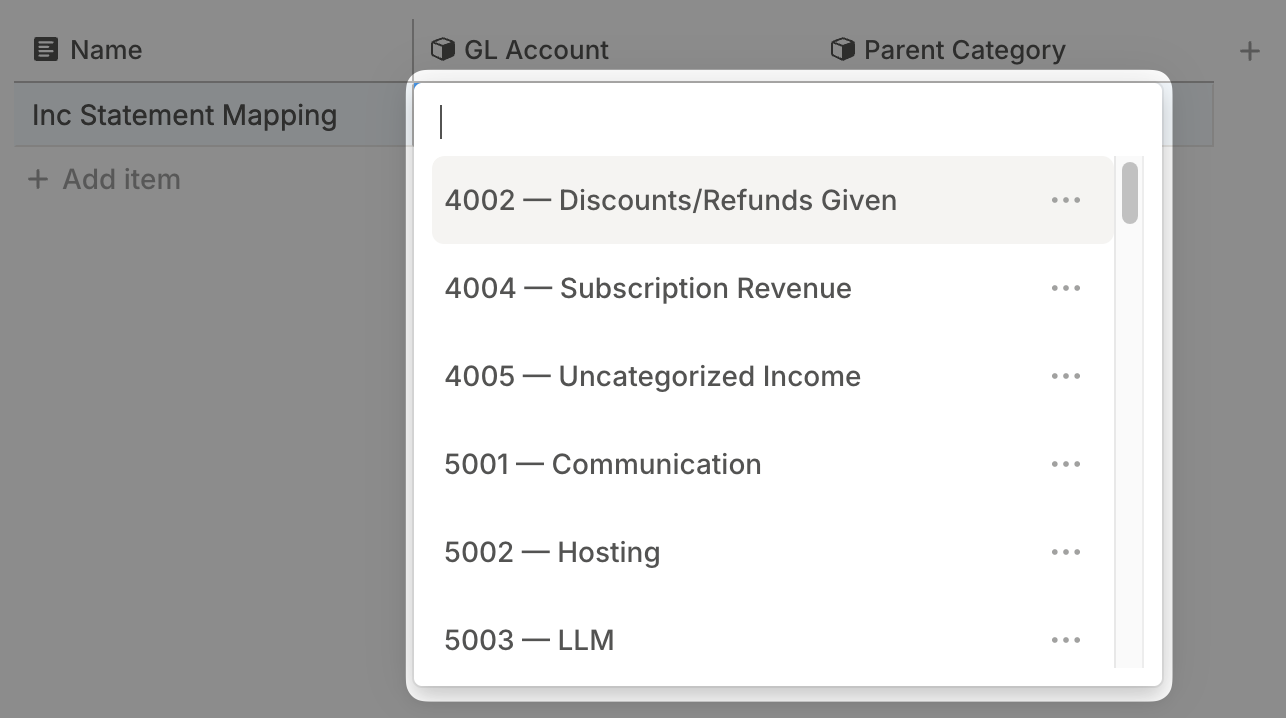
Once the new column appears, double-click into any cell to assign the attribute you want the segment to map to. Repeat this for each row—you must assign an attribute for every row.
- As your business grows and changes, this lookup table is where your mapping will be maintained. For example, if new GL Accounts are added, they will automatically flow into this lookup table due to the database configuration. You must manually set any new mappings for new line items.
Fully user-created Lookup
- Create a new database where the lookups will be set.
- Click on the + in the database header, select Dimension, and select an existing dimension or create a new one. This is the value that will be used to look up the additional dimensions that you set.
- Click on the + in the database header, select dimension again, and select an existing dimension or create another new one. This is the lookup value that will populate in other databases based on the dimension that you set in Step 2.
- Click Add item in order to create a new row in the database. Because these dimensions are not driven by a data source, all attributes will need to be manually added, either by typing them in, copy/pasting into the database, or selecting from the options available.
- Select the lookup result dimension in the new row and enter the value that should be inserted when the Step 2 dimension matches. Repeat this for each lookup pair you need.
Populating lookups in other databases
Once your lookup table is set, you can leverage it in any dimensional database in Runway. Notably, this excludes legacy databases that utilize fields (dimensions or drivers with only column-level formulas), which are exclusively scoped to HRIS databases. In order to populate a lookup, navigate to a database that includes the dimension you will be using to designate the lookup value (GL Account in the examples above). Click on the + in the database header in order to create a new column and select Lookup.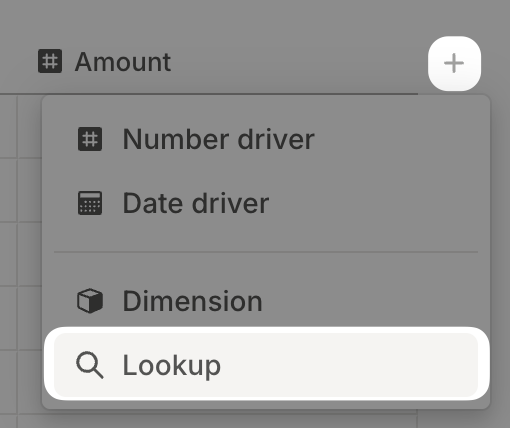

Lookups FAQs
How can I tell if a lookup is empty or has not been set?
How can I tell if a lookup is empty or has not been set?
The easiest way to do this is to filter on the database where the lookup column has been added and filter for if that lookup value is empty. Any line items with an unpopulated cell in this lookup column is an indication that it has not been set in your lookup table.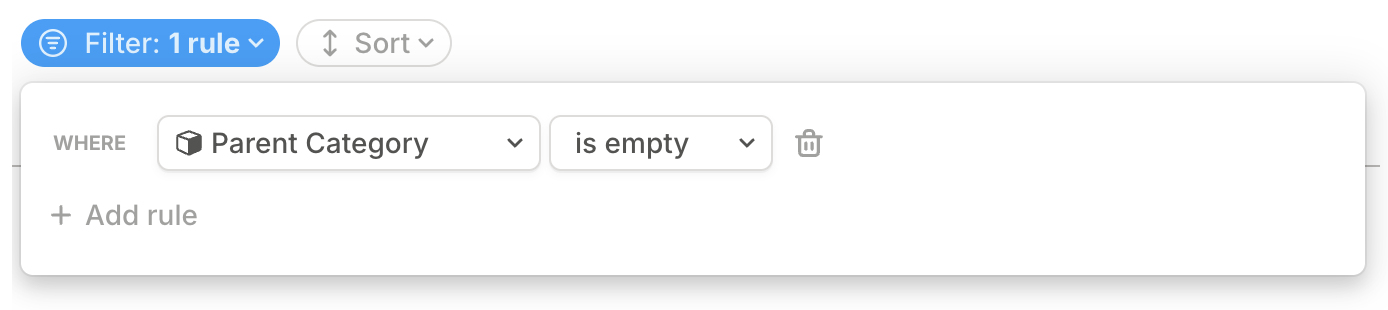
Can I do lookups with driver values?
Can I do lookups with driver values?
Not at this time but we intend to make this available in the future.
Can I set a lookup based on multiple dimensions?
Can I set a lookup based on multiple dimensions?
For example, if Dimension A and Dimension B, then map Dimension C. We do not have a productized way to do this from a single database, however, there are some creative workarounds for this, pending your use case. Please reach out to your CX Manager to explore this more!